
TreePlotter™ has a module to allow Administrators to manage Users. This tutorial will cover what to do if a User requires access to TreePlotter, update User access, or remove User access. This tutorial is written for Administrators; if you are a User, the Tutorial: Managing my login may be of more use to you.
Topics covered in this tutorial:
- Overview of the All Users menu option
- Adding a new User
- Organizations/Multi Organizations/Survey/Sites variation
- Editing an existing User
- Choosing the correct role
- Restricting access to a subset of trees
- Restricting access to a particular organization/site/survey
- Set filters against roles
- Deleting Users
- Exporting Users
- Video
Overview of the All Users menu option:
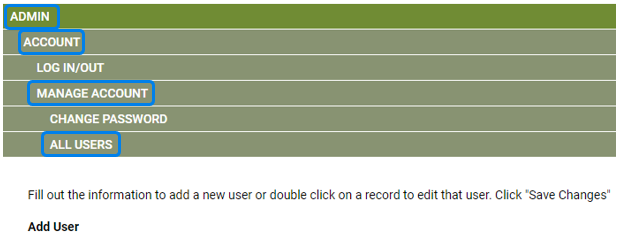
In order to access the following menu items, please log in as a user that has been assigned the Admin role.
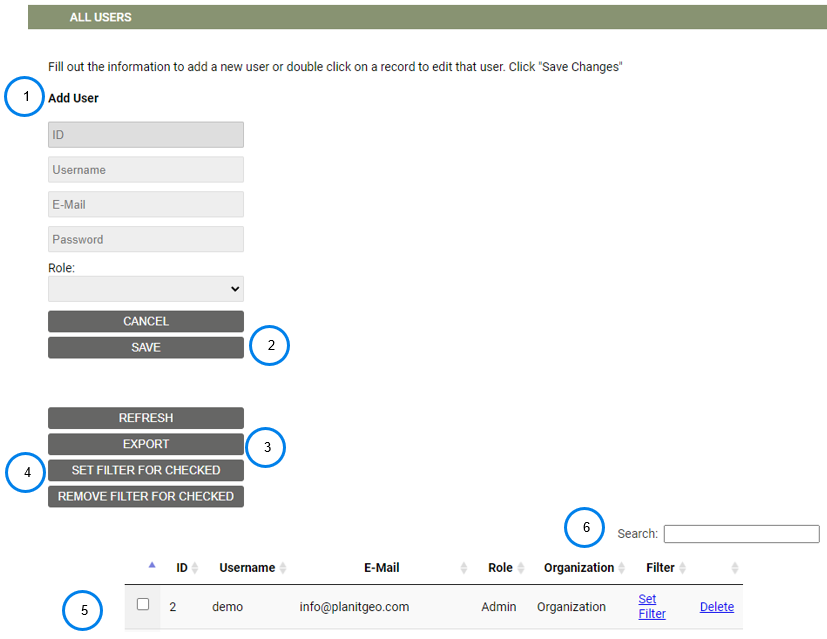
Click on Hub > Admin > Account > Manage Account > All Users and you’ll find the following:
- The Add User form, which also turns into the Edit User form
- A button to save changes made to the Add/Edit User form
- A button to export the list of users
- Buttons to limit multiple users to a subset of data
- A table listing the existing users
- A search box to look for users
Adding a new User:
To access the Add User form, click on Hub > Admin > Account > Manage Account > All Users.
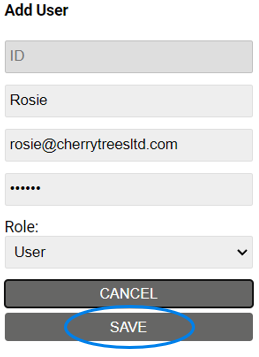
You’ll need to fill out this form with the following information:
- ID
- This is automatically populated
- Username
- This is what the user will log in with each time
- It will be displayed in the User Added and Last Modified fields in Detail Forms within your app to record who made the change
- You may like to take a look at the existing users to help you decide on a format. For example, you could match it to the beginning of their email address to make it easier to remember
- It is case sensitive
- Note: If your username has automatically populated the Username field either delete it out or click the Cancel button
- Email
- Enter their email address
- It should be a valid email address as it is necessary for the user to reset their password
- It should be a unique email. If it is already tied to another user, you won’t be able to use it again
- Enter it in lower case for consistency and to make it easier for users to reset their password, if necessary
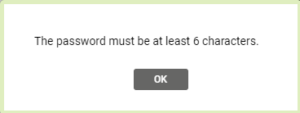
- Password
- Enter a password for this user
- It is case sensitive
- The password must be at least 6 characters in length, otherwise you’ll get this message
- Role
- Select the appropriate role for the user. This allows you to control which menu items will be available to them. More on that later
- Click on Save to save the changes
At this point you have created a new user! We recommend that you log in as the new user to ensure they can do (and not do) everything you expected. If you need to restrict the data that a user can see, please see the later section on restricting access to a subset of trees.
Organizations/Multi Organizations/Survey/Sites etc variation:
If you have one of these layers, there is an additional step. Choose an organization/survey from the dropdown box to give the user access to a specific site. To choose multiple organizations/surveys for the user, select any additional options in the checklist below the dropdown, if available.
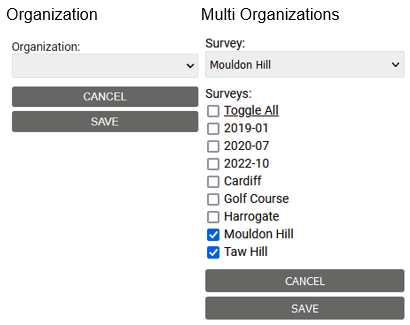
Note that all Admin accounts will have access to all organizations/surveys regardless of which boxes were checked. Again, it’s important to log in as the new user to test it’s doing what you expected.
Editing an existing User:
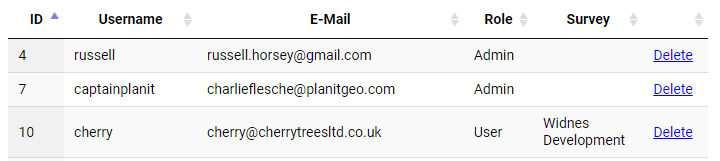
From the All Users menu, you will see a table listing the existing users.
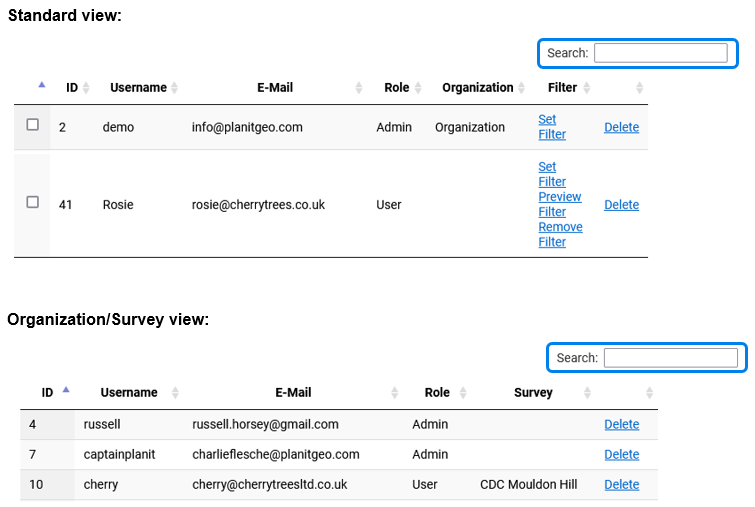
To edit a user, double click on their record (anywhere on the row) and their details will be displayed in the Edit User form above the table.
If you have a lot of users, you may like to use the Search option in the top right to filter. You can filter based on username, email or role.
You can change their Username, their Email and their Role by editing the form. If you have organizations then you can also change which org(s) they can access.
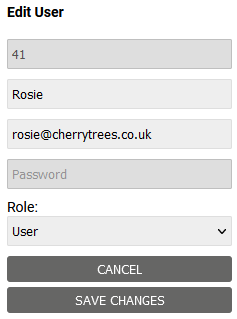
Click the Save Changes button to save the changes.
Note that you can’t change the password of the user once they have been set up, the user will need to do that themselves.
Choosing the correct Role:
Specifying the role is the way to determine the level of access a user will have when they log in. Here are the standard three, but additional roles can be purchased (so your list of roles may be longer).
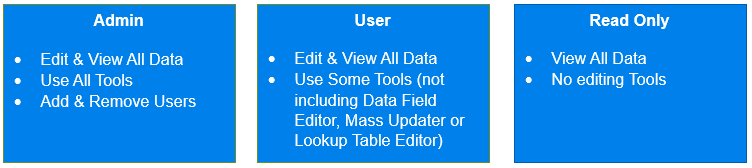
We recommend limiting Admin users to just the select few users who will be looking after TreePlotter. Users are most likely everyone else who needs to use TreePlotter and Read Only is good for managers and other members of the organization who might want to see TreePlotter but have no need to change it.
Another common role is General Contractor. This is used with the Work Order Management module and given most often to external contractors. Whilst the specifics of this role may vary between customers, these users are generally limited to update only a handful of work record fields.
Restricting access to a subset of data:
To restrict users to a subset of data within your app, first use the Advanced Filter to create a filter in TreePlotter that returns only those assets that the specific users should see (perhaps they should just be able to see trees that are publicly owned or just those in a particular location, etc). The filter may need to include restriction on the other layers.
Apply the filter to the map.
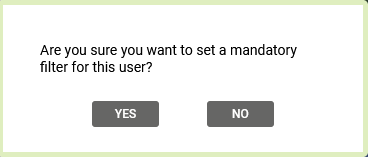
Back in the All Users table, click on the Set Filter link against the user to apply that filter to them

Say yes to apply a mandatory filter to this user and OK to the message that lets you know it has been set successfully.
Now when they log in, they see the data that meets the filter criteria.
If you later want to check what the user has been restricted to, click on Preview Filter. This will apply the Filter in TreePlotter and the Map View/Legend/Data Table/etc. will reflect what data the user sees on their login. (Tip: see the yellow filter description drop down for a quick summary of the filter criteria.)

To remove the filter from a user, click on the Remove Filter link.
To give a user a new filter, apply a new filter to the map and then click on Set Filter to apply the new filter to them.
To edit the filter, click on Preview Filter to see their current filter restrictions, update the filter as needed, then click on the Set Filter link to apply it.
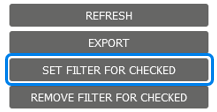
If you have several users who need the same filter, you can check the box on the left of the row for each of them and then click on the Set Filter for Checked button
Restricting access to a particular Organization/Site/Survey:
If you have the Organizations/Multi Organizations/Survey/Sites etc variation of TreePlotter, then you would restrict users down to a particular organization.
Set Filters against Roles:
If required, roles can be restricted to access a subset of data based on a filter.
- Navigate to Hub >Admin >Account >Manage Account > Roles
- Apply a filter to the TreePlotter map using the Advanced Filter
- Back in the All Users table, click on the Set Filter link against the role to apply the filter
- If you wish several roles to have the same filter, check the box against each role and then click “Set Filter for Checked”
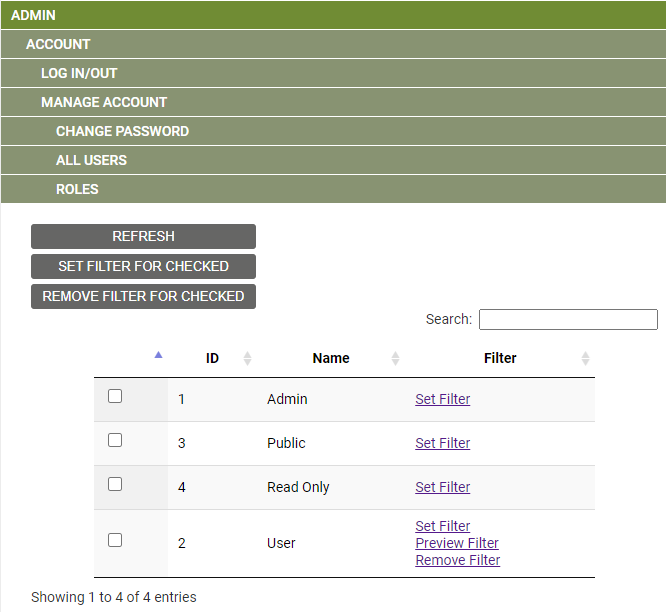
The Public role controls what you can see before you log in, so if you have trees that are available to the public, you can restrict the trees that appear by applying a filter and setting it against the Public role.
Note: Updating the role filter will automatically apply the new filter to each user in that role AND it will take precedence over any individual filters.
Note: This option isn’t available if you have Organizations/Sites
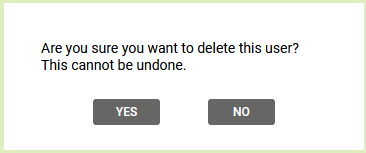
Deleting Users:
Locate the user in the table of users and click on the Delete link. You may need to scroll over to the right to see it. Say yes to confirm you want to delete them.
Note that any auditing fields, such as Last Modified User, will still contain their name, as a record that they added or modified a Tree, etc.
Exporting Users:
You can export a list of your users to a csv from the user table. Click on the Export button. Useful in case you need a separate list of your users.
Known limitations:
- You need to be logged in as a user with the Admin role in order for the menu options to appear
Next steps:
- How To: Add a User
- How To: Edit a User
- How To: Limit a User to a subset of data
- How To: Limit a user to a particular Organization/Site/Survey
- How To: Delete a User
- How To: Choose the right Role
- How To: Edit field permissions by Role
Video:
Here is a video showing you all you need to know about the admin module!