
When using TreePlotter™ INVENTORY, you can summarize and visualize sub-sets of your inventory data based on specified attributes by using the Advanced Filter tool. Applied Filters affect the data displayed in other TreePlotter™ tools such as graphs and reports.
Topics covered in this tutorial:
- Accessing the Advanced Filter
- Check for Applied Filters
- Applying a Filter
- Null and Not Options
- Using a Map Filter
- Layer Filter Settings
- Filtering Multiple Layers
- Global Filter Settings
- Advanced Filter and TreePlotter Tools
- View Filters
Accessing the Advanced Filter
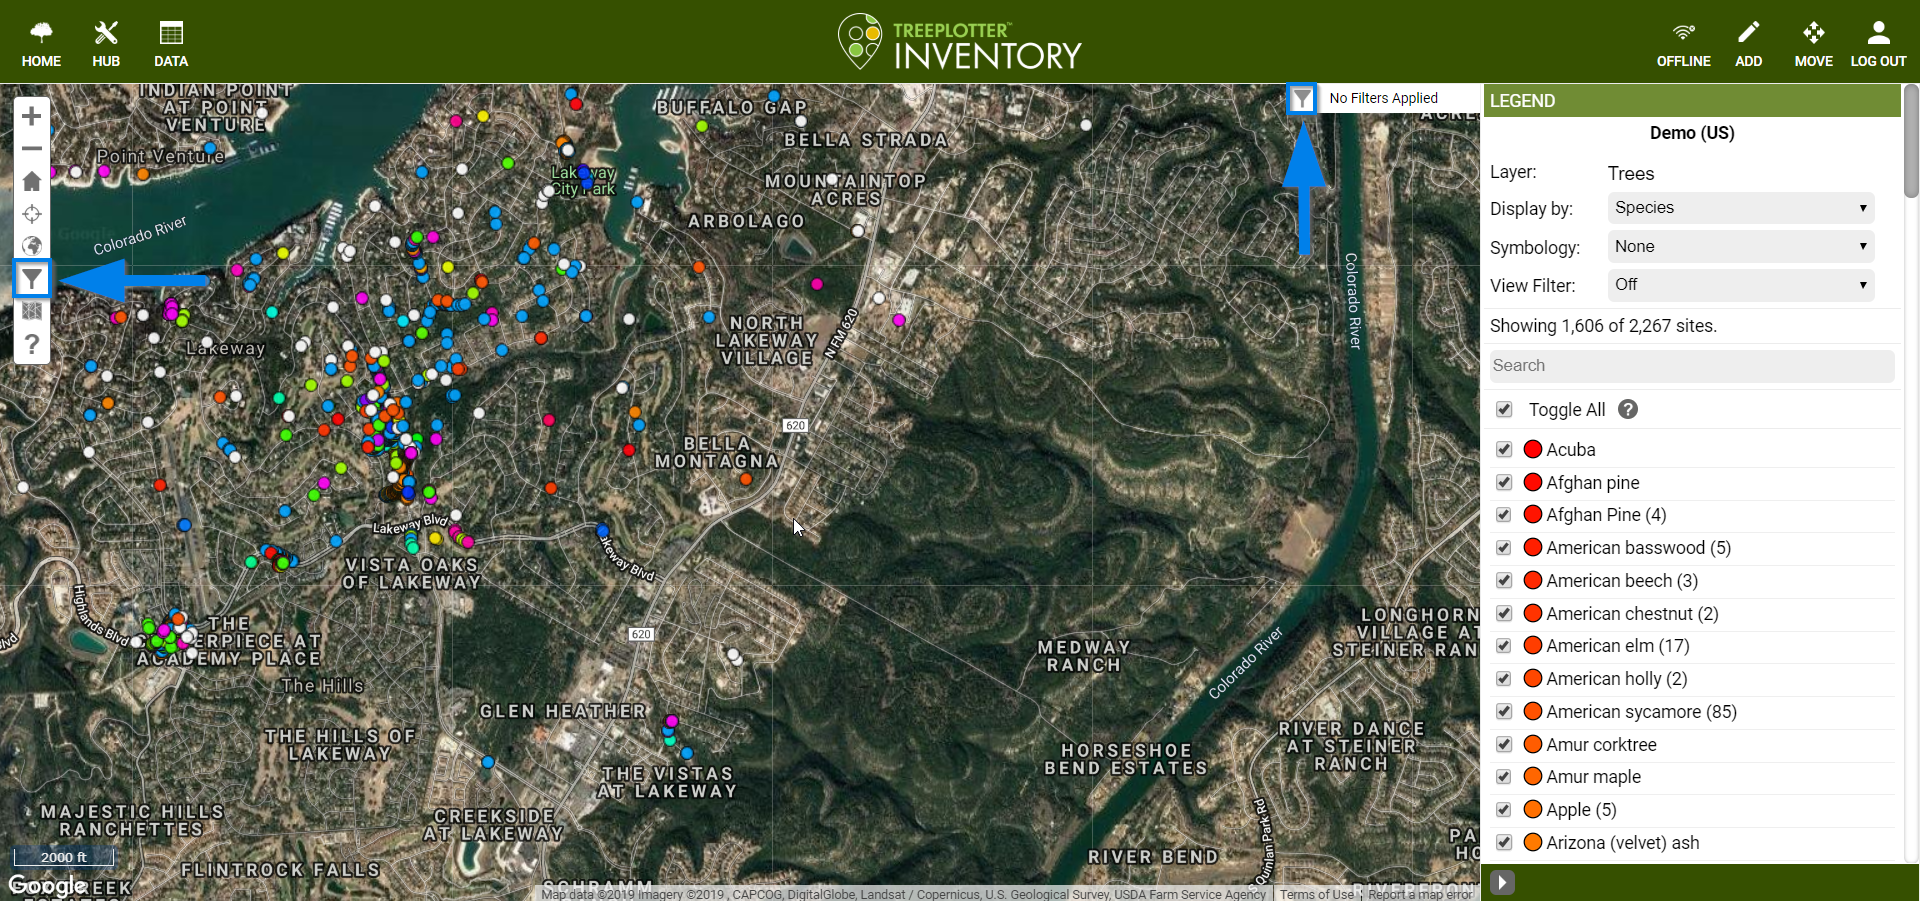
You can access the Advanced Filter from the Navigation Toolbar on the left side of the Map View or the Filter Applied box in the top right corner of the Map View. .
Check for Applied Filters
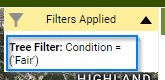
The Filter Applied box in the top right corner will turn yellow if a filter is currently applied. To view a summary of the applied filters, click the black arrow inside this box.
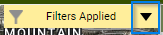
The dropdown window is a quick way to view criteria of the content displayed in the Map View.
Applying a Filter
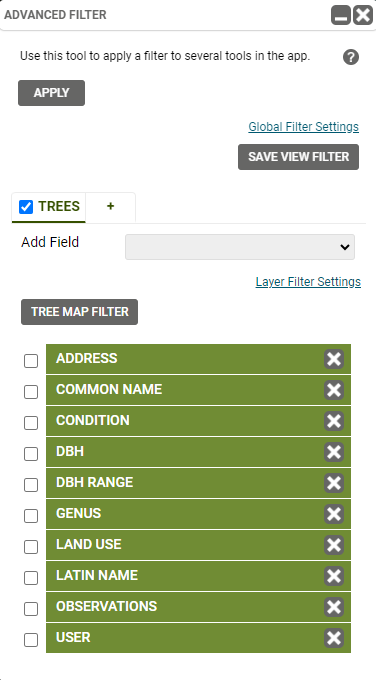
- To apply a filter, open the Advanced Filter by clicking on the funnel icon in the white Navigation Toolbar or in the top right corner of the Map View.
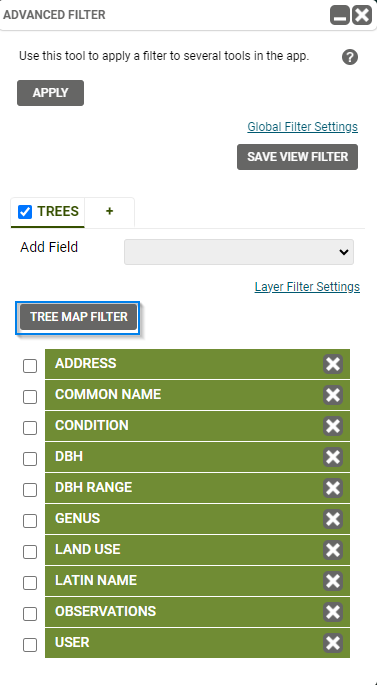
- The filter will default to the layer you are viewing in the Legend, for example Trees. If you do not see the layer you want to filter, click the plus sign (+). Click on the desired layer to add it to the Advanced Filter.
- Note: Please contact TreePlotter Support here to request fields be added or removed from the default list.
- Look through the Fields displayed in green and click on the Field you want to filter. This expands the Field to display the field options.
- If the Field you want to filter by is not listed, click the Add Field dropdown to bring up a list of supplemental fields.
- Select the desired Field from this list to add it to the filter.
- The field type determines the selection options:
- Number fields (ex. Date Added, DBH):
- use the slider bar to select from a range, or
- Click the Exact tab to enter a specific number or date.
- Dropdown, Multiselect and Radio buttons (ex. Status, Observations):
- make a selection from the list of field options
- Lookup tables (ex. Common Name, User):
- make a selection from the popup window
- Text Fields (ex. Comments, Address):
- Number fields (ex. Date Added, DBH):
- When you are satisfied with your choices, click Apply.
- To remove a field from the applied filter, uncheck the box and click Apply.
- To clear all filters, click the Clear All Filters button.
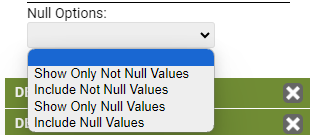
Null and Not Options
To filter features with blanks in specific fields, use the Null Options.
- Click the checkbox next to the field to expand the selection options.
- At the bottom of the selections, click the Null Options dropdown. All fields have the same four options.
- Show Only Not Null Values — this option overrides any selected field options. The result shows only trees with not Null values.
- Include Not Null Values — use this option in conjunction with the field options. The result includes any features with not Null values and any selected field options.
- Show Only Null Values — this option overrides any selected field options. The result shows only trees with null values.
- Include Null Values — use this option in conjunction with the field options. The result includes any features with Null values and any selected field options.
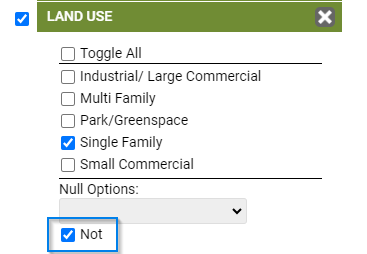
Below the Null Options is the Not option.
Use the Not option to exclude trees with certain attributes. In the image on the right for example, the filter will not show any trees that have Single Family checked in the Land Use Field.
NOTE: The Not option applies only to the field options, not the Null Options.
Using a Map Filter
You can also filter features based on spatial location by using a Map Filter.
- To access the Map Filter, open the Advanced Filter by clicking the funnel icon in the Navigation toolbar or in the top right corner of the Map View.
- Select Map Filter (Note: the exact name of the button varies based on the Inventory Layer you filter, ie. Tree Map Filter for filtering on the Tree layer.) Once you click the button, the Advanced Filter window minimizes.
- Click on the map to draw a polygon around the features you want to select. Each click on the map, adds a vertex to the polygon. When you’ve captured all of the desired data, double-click to finish the shape.
- Once the polygon is created, change the shape to include more or less features by dragging the polygon boundary.

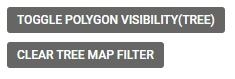
Note: Once a Map Filter is applied, two additional buttons will appear in the Advanced Filter. The Toggle Polygon Visibility will show or hide the border of the polygon. Clear Map Filter will remove only the Map filter.
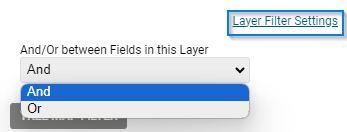
Layer Filter Settings
Under Layer Filter settings you can specify how the filter options are combined within a Layer. “And” is selected by default, which means that features have to meet all criteria specified in the filter.
To change this setting, click the Layer Filter Settings (located under the Add Field dropdown). In the dropdown select “Or”. Now the filter will return any features that meet at least one condition set in the filter.
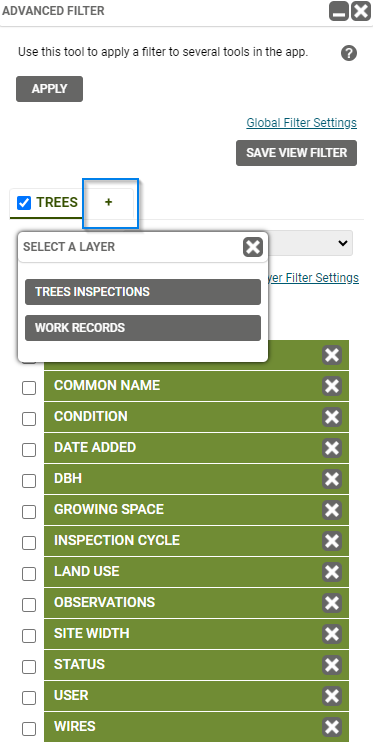
Filtering Multiple Layers
The Advanced Filter allows you to apply filters to multiple INVENTORY Layers at once. Filtering multiple layers can be very useful for those clients with our Work Order Management module.
- In the Advanced Filter window, click the plus (+) button. A new window appears with additional Inventory Layers.
- Select the layer you want to add to the filter.
- Apply filters on the selected layers. Switch between layers by clicking on the tabs above the Add Field dropdown.
- Click Apply once you’re satisfied with your selections.
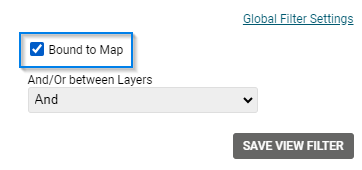
Global Filter Settings
The Global Filter settings works in the same way as the Layer Filter settings except that Global Filter settings specifies how filter options are combined between Layers. The Global Filter settings are located in the top right corner of the Advanced Filter.
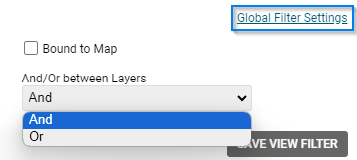
Here you can also check the Bound to Map option. Checking this box centers the map around the filter results so you can easily see all features.
The Advanced Filter and TreePlotter Tools
Once a filter is applied, it will interact with other TreePlotter Tools including the Charts, Reports, Mass Updater, Data tables and more. This means that the data displayed in those tools correspond to the filter you have set.
View Filters
If you use the same set of conditions on a regular basis, you can save time by setting up a View Filter. Saved View Filters are available for quick and easy access in the View Filter dropdown within the Interactive Legend.
To set up a View Filter:
- Open the Advanced Filter.
- Set up the filter as described in the Applying a Filter section above.
- In the top right corner of the Advanced Filter, click Save View Filter.
- In the new window, click Create New Filter and enter a name. Then click Save.
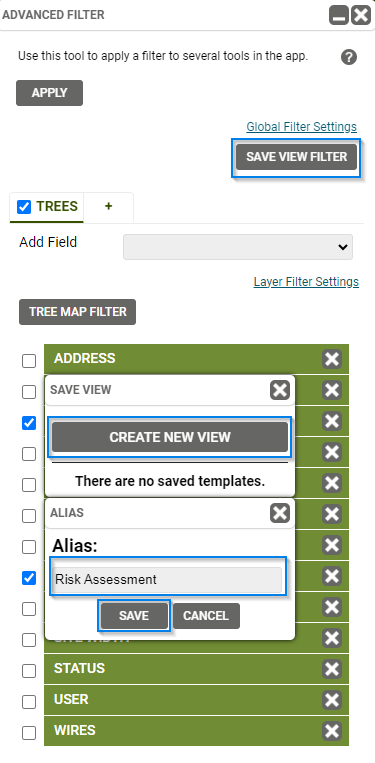
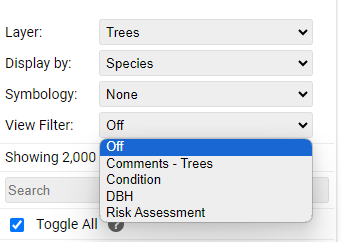
To access View Filters you have set up, choose from the View Filter dropdown in the Interactive Legend.
Known Limitations:
- Filtering on a Text field: only one option can get added to the filter at a time. The text has to match the value within the records exactly.
- When setting a filter on Work Records or Inspections, Trees will also filter down.
- When setting a filter on Work Orders or Service Requests, Work Records and Trees will also filter down.
- If your application has Client Sites or Organizations, an automatic filter is applied after loading trees. However, if trying to filter for inspections within that Client Site an additional filter will have to be placed on the Trees layer for the Client Site field. This additional filter will then filter down the inspections within the Client Site.
Potential Next Steps:
- How To: Save a Filter
- Tutorial: Mass Updater
- Tutorial: Exporter
- Hub: Reports
- Tutorial: Map Scenarios
Want a video tutorial on the advanced filter? Click below: