
The TreePlotter™ Mass Update tool is a very powerful tool that can update attributes for large groups of trees to one new value. This tool works well when a shared attribute across a large subset of data needs to be updated. Rather than updating the attribute in each occurrence, the Mass Updater will update all occurrences of the attribute with a single workflow which has the potential to turn a tedious task into a quick process.
Topics covered in this how to article:
- Preparing Data for the Mass Updater
- How to access the Mass Updater
- How to Mass Update
- Routines
- How to Mass Delete
- Known Limitations
- Potential Next Steps
Preparing data for the Mass Update tool:
It is important to filter the data correctly so you only update or delete the intended data points. You can use the Advanced Filter to appropriately filter the data. Here is a link to the instructions for the Mass Update tool.
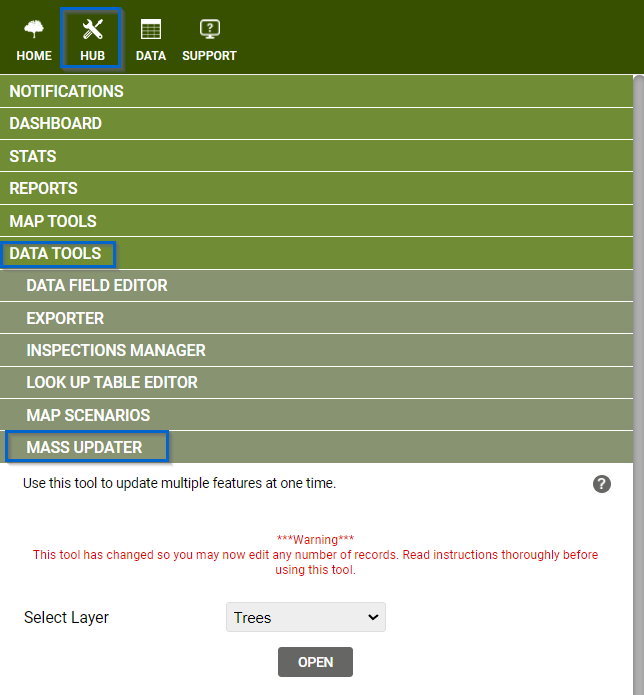
How to access the Mass Update tool:
- Click on HUB > DATA TOOLS > MASS UPDATER
- Choose the layer from the Select Layer dropdown to mass update
- Click the ‘OPEN’ button
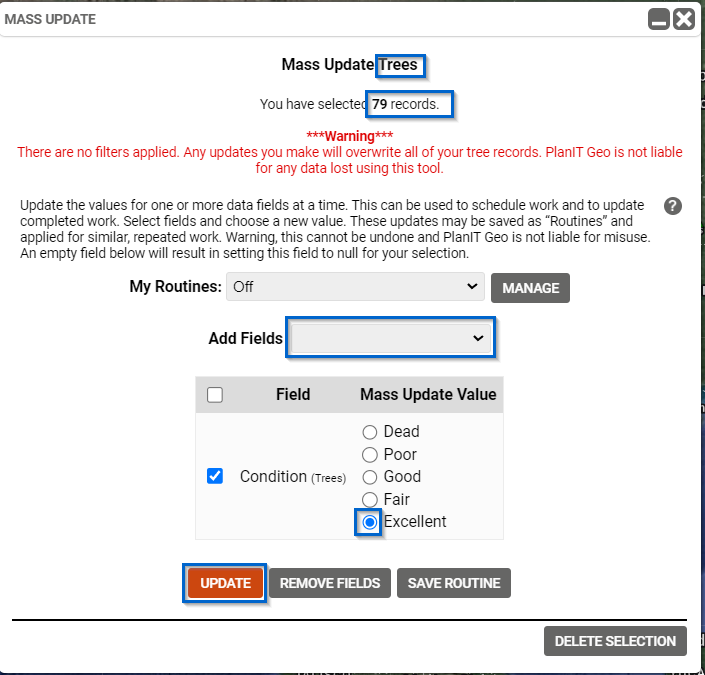
How to perform the Mass Update function:
After using the Advanced Filter to filter the data points you want to mass update:
- Use the Select Layer dropdown to choose the layer you’d like to update.
- Click the ‘OPEN’ button.
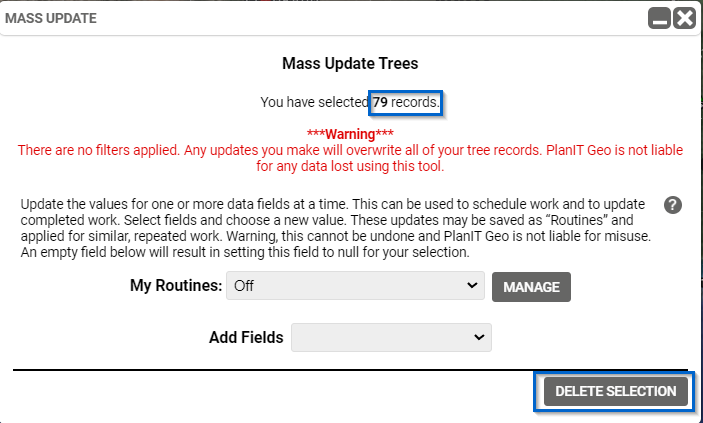
- Be sure to review the layer type (e.g. Trees) and number of records (e.g. 79 records) you have selected near the top of the Mass Update tool and ensure these match your planned update.
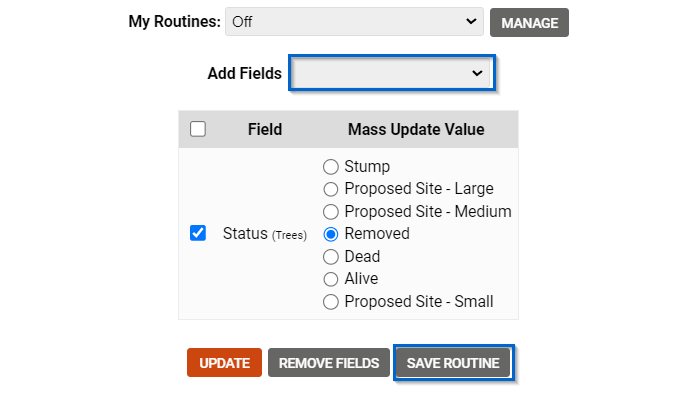
- Choose the fields you would like to update by clicking on the Add Field dropdown.
- If you want to remove a field you have selected, click the check box for any fields you want to remove and then click Remove Fields.
- Click the ‘UPDATE’ button.
Note: If no filter is applied, the update will be applied to ALL of your records for the selected layer.
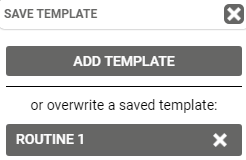
How to create a Routine:
Using the My Routines dropdown, you can set up updates to several fields and save them to use again. To create a routine:
- Click the Add Fields dropdown to select the fields and values you would like to update
- Click the ‘SAVE ROUTINE’ button.
- You will be prompted to create a new routine or overwrite an existing routine.
- Click the ‘ADD TEMPLATE’ button to create a new routine then give your routine a specific name, or
- Click a saved routine (e.g. ROUTINE 1) and overwrite the name for the routine, if desired.
- Click the ‘SAVE’ button to save the routine.

Your routine will now show up in the My Routines dropdown. You can delete old routines by clicking the ‘MANAGE’ button.
How to Mass Delete:
The Mass Delete function is integrated into the Mass Update tool. After using the Advanced Filter to filter the data points you want to delete:
- Use the Select Layer dropdown to choose the layer on which the assests you’d like to delete, exist.
- Click the ‘OPEN’ button.
- Be sure to review the layer type (e.g. Trees) and number of records (e.g. 79 records) you have selected near the top of the Mass Update tool and ensure these match your planned delete.
- Click the ‘DELETE SELECTION’ button.
- A pop-up window will warn you that your data will be permanently deleted.
- Click the ‘YES’ button to delete your selection.
Known Limitations
- Generally, the Mass Updater is only available for admin level users.
- The data changes cannot be reversed in most cases.
- The data must be filtered before changes are made.