Overview:
Checkbox and Multi-select fields require some additional data preparation in order to upload into TreePlotter INVENTORY™. This article details the process of preparing these fields for the upload.
Prerequisites:
- Must have an Admin account in order to access this tool
- Must read Preparing Data for the Uploader to ensure your data is ready for the uploader.
- Tutorial: Data Field Editor
Topics covered in this tutorial:
- Preparing the file
- Crosswalk
Preparing the file:
To upload data to a Checkbox or Multi-Select field, you must use a CSV file for the upload and go through additional steps to prepare the data. This process is necessary because these fields allow multiple options, and the Uploader needs to recognize each option separately. The instructions below will walk you through you the steps. All screenshots use the Tree Work-Pruning field as an example.
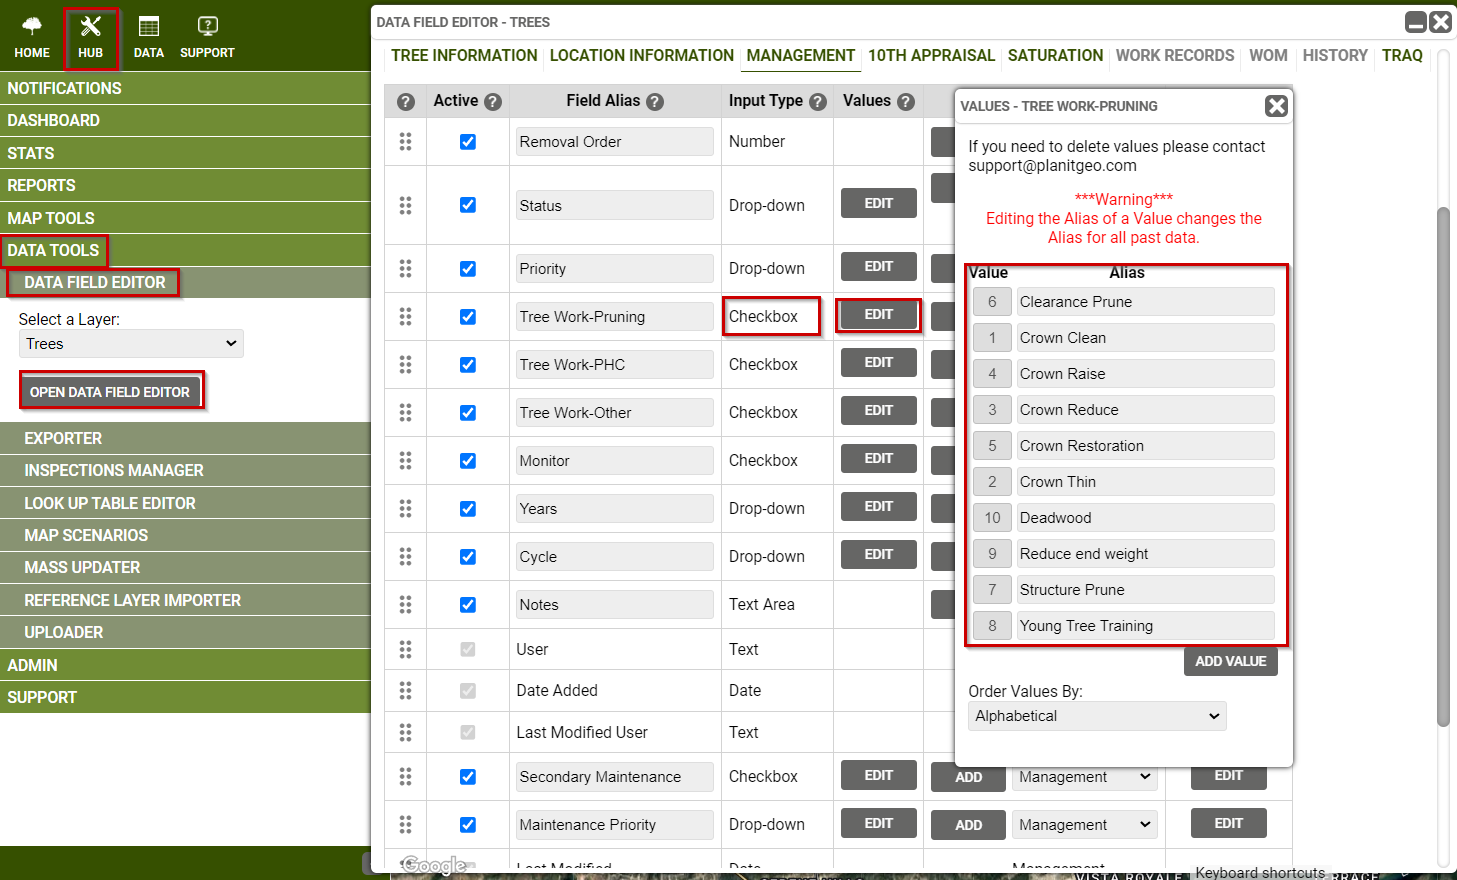
- Ensure the field you are importing exists in your app along with all the options in your data. If the field or any options are missing, use the Data Field Editor to add them.
- The data for your field will appear in one column in the CSV file. However, in order for the data to be properly added to TreePlotter, each option will need to have its own column in the CSV. To achieve this:
- Highlight header row in your CSV, then click Sort & Filter in the Tool bar and select Filter.
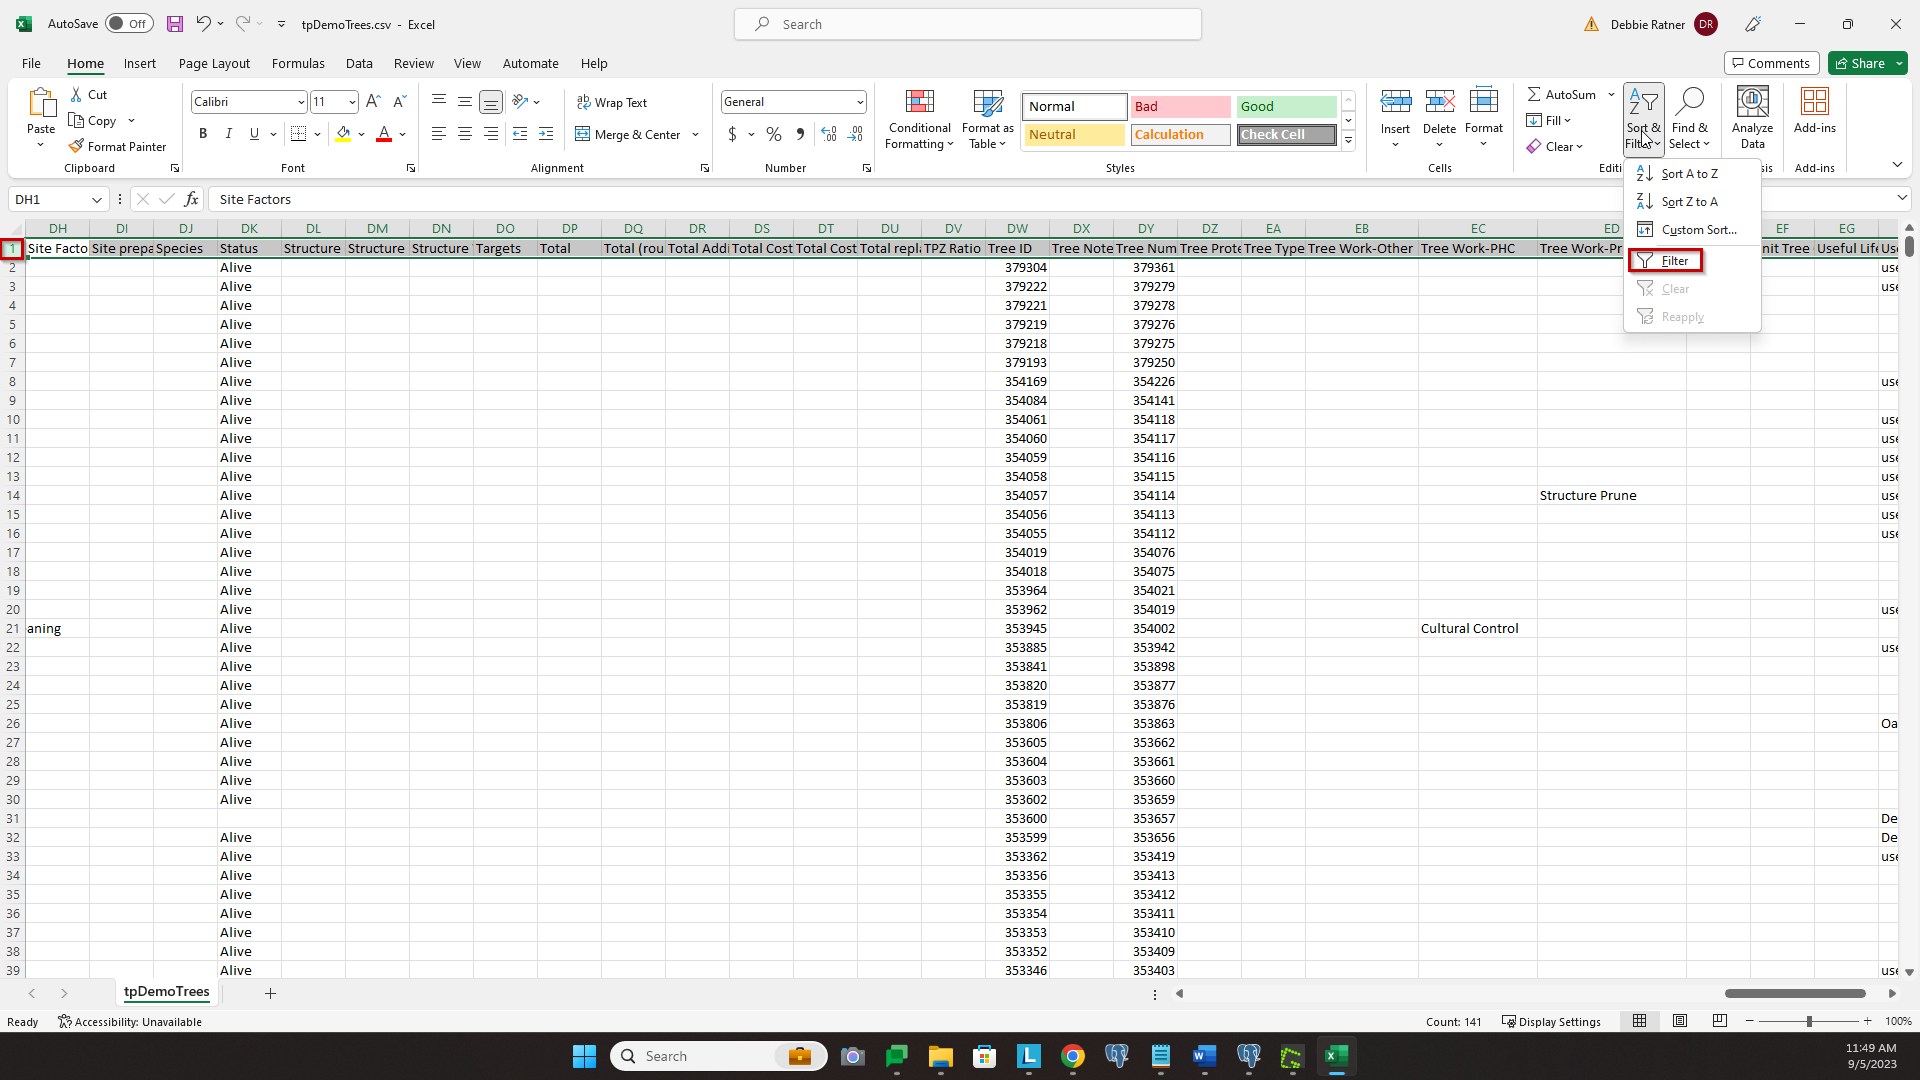
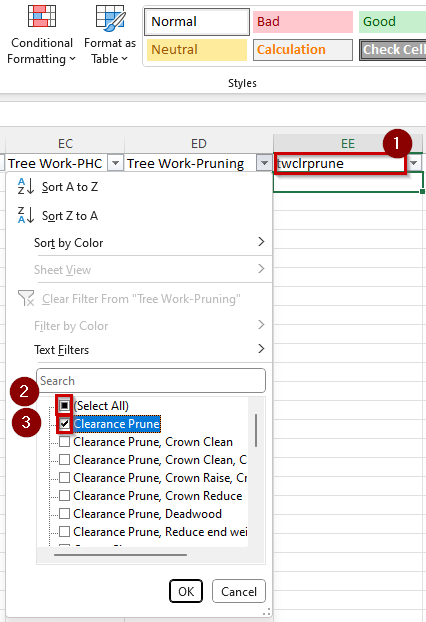
- Select the funnel for your field’s column to see all unique values.
- Insert a column for each individual option. Give the column a unique name referring to the field and its option. For example, for the ‘Clearance Prune’ option in the Tree Work-Pruning field, you can name a new column ‘twclrprune’. Use consistent naming for each column (ie. for Tree Work-Pruning use the prfix ‘tw’) to ensure that all options for the field appear consecutively in TreePlotter’s Uploader tool.
Note: When naming a new column, keep to a 10 character limit.
- Highlight header row in your CSV, then click Sort & Filter in the Tool bar and select Filter.
- Next, you will populate your new columns. Click on the funnel for your field’s column, deselect all options by clicking on ‘Select All’, then select each option individually. This filters to show only rows with that specific value.
Use your new columns, and add an X into each column that the row has a value for. If there are multiple rows returned by filtering, make it easy on yourself and enter an X in the first 3 rows and highlight those rows, then double click or drag the small square in the right corner to populate the X’s to the end of the filtered list.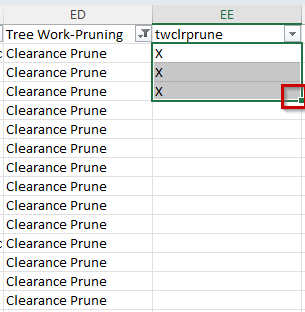 filter
 - Repeat this for each value in your field’s column.
Once you’ve completed the above steps for each of the Checkbox/Multi-Select fields, you are ready to upload!
Crosswalk
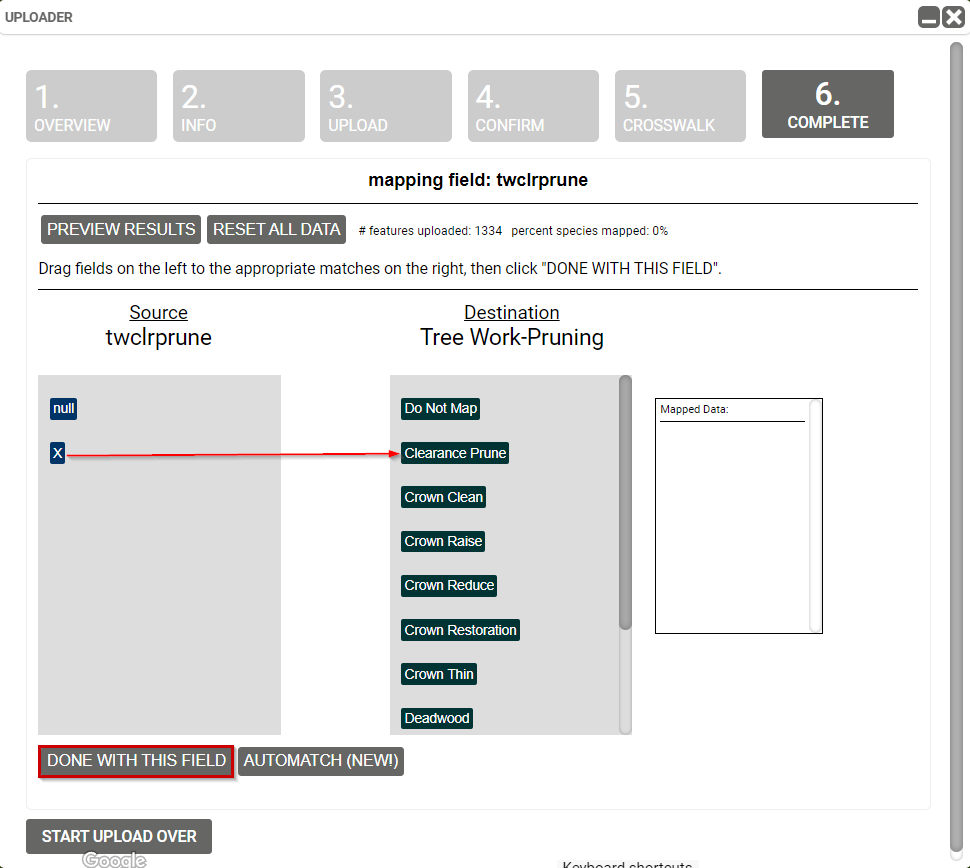
The crosswalk step of the Uploader distinguishes checkbox and multi-select fields with a green outline in the Destination column(right). The source data column(left) contains each column in the upload data. This means all columns you created in the steps above will appear separately and you’ll crosswalk each of these columns to the destination field individually.
- Choose the first column you created and select your field on the right. Then click on the arrow between the columns.
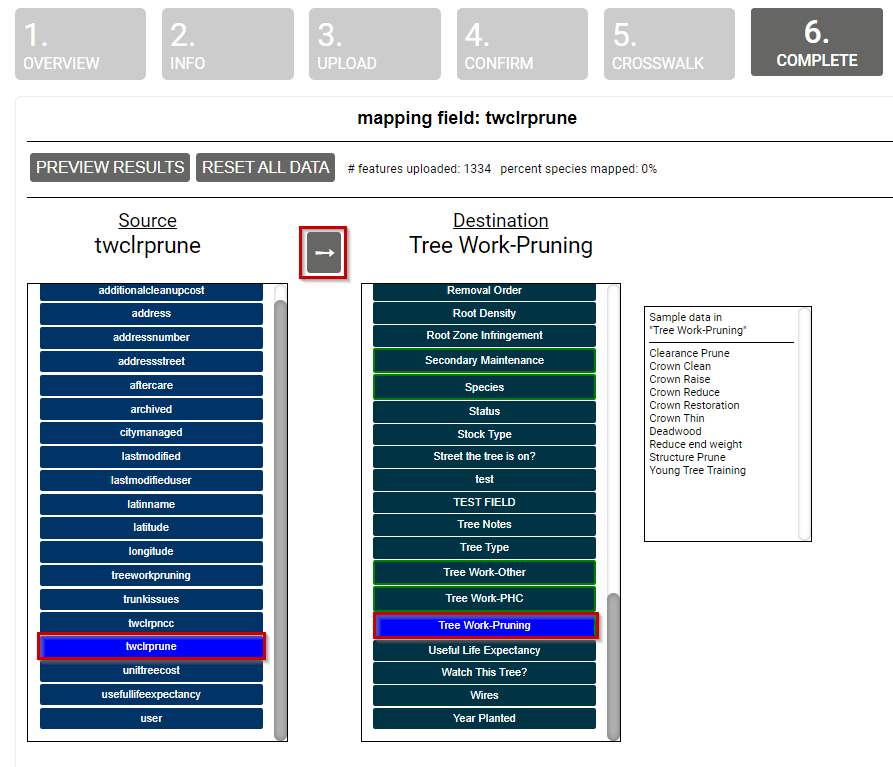
- Drag the ‘X’ or ‘True’ value to the corresponding value, then click ‘DONE WITH THIS FIELD’ and confirm.
- Repeat this step for each column.