
Learn how to run reports of your TreePlotter™ INVENTORY data. There is a detailed report that can be run directly from the tree, which includes everything, and there is a collection of reports that can be run for multiple trees via the Hub.
Note: The data shown in the reports
Topics covered in this tutorial:
- Navigating to the Tree Reports
- Tree Report Properties
- Single Tree Detailed Report
- Multi-Tree Reporting
- Printing Reports
- Other Types of Report

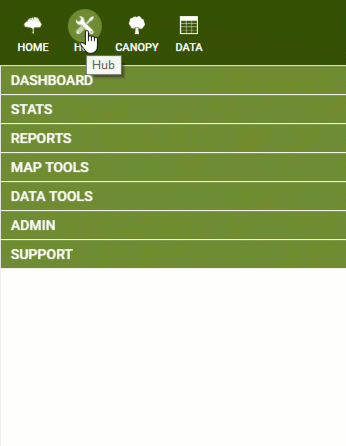
Navigating to the Tree Reports:
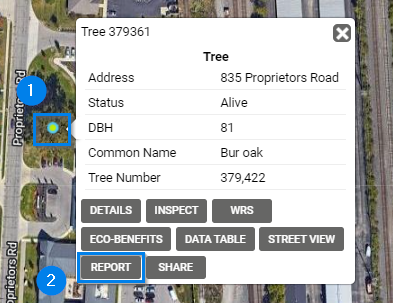
- Single Tree Reports
- Select the “Report” button found within the Tree point popup window
- Multi-Tree Reports
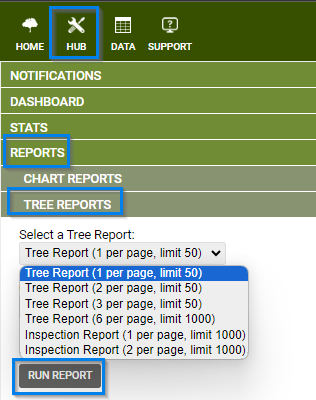
- The HUB > Reports > Tree Reports
Single Tree Detailed Report:
- Choose this option to produce a detailed report of all the information regarding a single tree.
- The report has a cover page and then the tree detail for each tree. Click on the ‘Hide’ button to hide each section not required. Click on the ‘Show’ button to enable it once more.
- If available, photos and a map view will be displayed. Simply click the ‘Hide’ button next to the map or photos to hide these features.
- This report shows all fields, includes ones that may have been created by yourselves, as well as inspection information, work records/work history information where applicable, eco benefit information where applicable, and an audit history of changes made to the tree!
Multi-Tree Reporting:
- Select how many trees should be printed per page ranging from 1-6 trees per page.
- The amount of information available to display per tree decreases as more trees are printed on the page.
- Give the report a title, optionally. Check the Use Applied Filter box to restrict the results to the filter currently in use. Click on the ‘Run Report’ button.
Note: The reports will reflect any filter applied. Click on the Advanced Filter button on the Navigation toolbar and filter for the section of data that you are interested in. Then when you run the report, it will show the records required, within the limits of the report. If you uncheck the ‘Use Applied Filter’ box, then it will show all trees, still within the limits of the report.
Printing Reports:
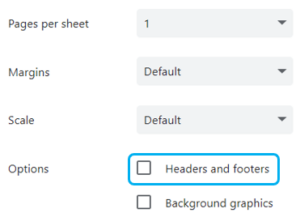
- Once you have generated your report and hidden any required sections, click on the ‘Print’ button in the top right
- You can print to a physical printer or to a PDF
- You can control whether the automatically generated headers and footers (that contain the name of the report and page numbering etc) are included using the tick box on the Print dialogue box.
Other Types of Reports
- Spreadsheets of data
- You can use the Data Table to send the exact information you’re interested in off to spreadsheet. You can control which fields are displayed, the order they appear in, and the records shown
- Tutorial: Data Table
- Chart reports
- This style of reports allows you to collate a number of charts into a report or PDF to share. Seeing data visually like this makes it very accessible and easy to understand
- Matrix reports
- This is a grid of information and allows you to compare two attributes, say Height of Tree vs Condition or Diameter of tree vs Age
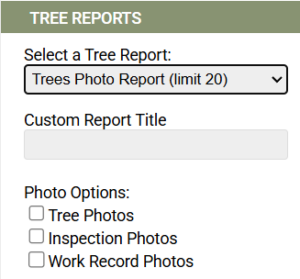
- Photo reports
- These reports include some basic details about the tree but then show your choice of tree photos, inspection photos or work record photos
Report Maximum Limits
There are limits to the number of trees you can include in a report at any one time.
- 50 tree limit
- These reports contain Google Maps and Google Street View
- If you need to report on more than 50 trees in a 50 tree limit report, please use the Advanced Filter to select the first 50 trees, run the report, and then run it again for the next 50 trees
- To increase the limit to 1,000 trees, please contact Support (support@planitgeo.com) to discuss removing the Google maps from your reports.
- 1,000 tree limit
- These reports don’t contain Google maps
- Please use the Advanced Filter if you need to report on more than 1,000 trees
- 20 tree limit
- These reports contain a lot of data, such as photos, and are limited so that they run in a sensible time.
- Please use the Advanced Filter if you need to report on more than 20 trees
Known Limitations:
- If the report doesn’t appear, make sure you have your pop up blocker disabled
- If you print the report as a PDF and just get a blank page, please clear your website browsing history
- It’s not possible for you to add or amend the fields in a report
- The fields shown in the reports are as standard and are not configurable. However, if you run the individual detailed report from the tree popup, it will print every field, including ones you’ve added yourself using the Data Field Editor tool
- Please contact Support (support@planitgeo.com) to discuss having different fields displayed in the Hub reports.
- You can’t create new reports, but they can be discussed with Support (support@planitgeo.com).