
This article details the process for linking an asset to a Service Request in TreePlotter™.
Prerequisites:
Steps to link an Asset:
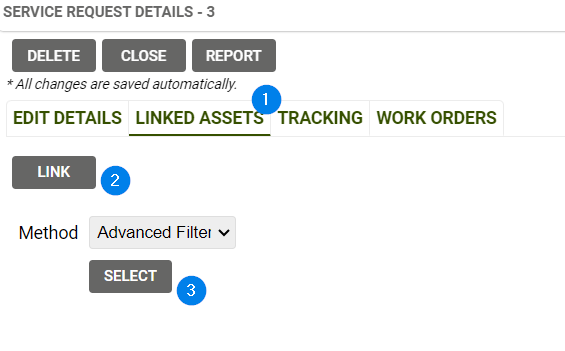
- After creating a new Service Request, navigate to the Link Assets Tab
- Select the ‘LINK’ button and choose a method.
- Point and Multi-Point – allow users to link an individual asset(s)
- Advanced Filter – allows users to link pre-filtered assets
- Polygon – allows users to lasso a group of assets based on their location
- ID – allows users to link assets based on their Primary ID
- Press the ‘SELECT’ button to link the asset to the Service Request.
Viewing, Editing, and Updating a Linked Asset:
- Use the crosshair icon to zoom to the linked asset on the map
- The Form/Magnifying Glass icon will open the Details Form of the asset
- Press the ‘Inspect’ button to open the assets inspection form
- If an asset needs to be removed from a Service Request
- Select the checkbox to the left of the asset
- Press the ‘UNLINK SELECTED’ button under the Service Request tabs to remove the linked asset

Known Limitations:
- The Linked Asset table is not editable
- To edit the details of an asset open the Details Form (see Step 2 from section Viewing, Editing, and Updating a Linked Asset)