
Here we will cover how to add photos and consider how to make full use of the photos available to you in TreePlotter™. We’ll also run through some troubleshooting steps if you are having issues.
Topics covered in this Tutorial:
- How to add Photos
- How to view Photos
- How to remove Photos
- Which photo is best suited to be stored where
- How to export photos
- Which photo types are supported
How to add Photos:
From a computer
- Click on ‘Choose Files’ against the Photos field
- It will allow you to browse to the photo on your computer, select the one(s) you want, usually to a maximum of 5
From a mobile device
- Click on ‘Choose Files’ against the Photos field
- You will have several options, depending on your browser and whether your phone is Apple or an Android
- Photo Library – you can select an existing photo
- Take Photo – you can take a photo directly within TreePlotter and it will upload it to the asset
- This option is currently only for Apple users
- Google made a change to not allow websites to access photos and we are unable to circumvent this. You have to take the photo first and then upload it
- Choose Files – you can select an existing photo from the Files folder on your phone
- Google Drive – you can select an exiting photo from Google Drive

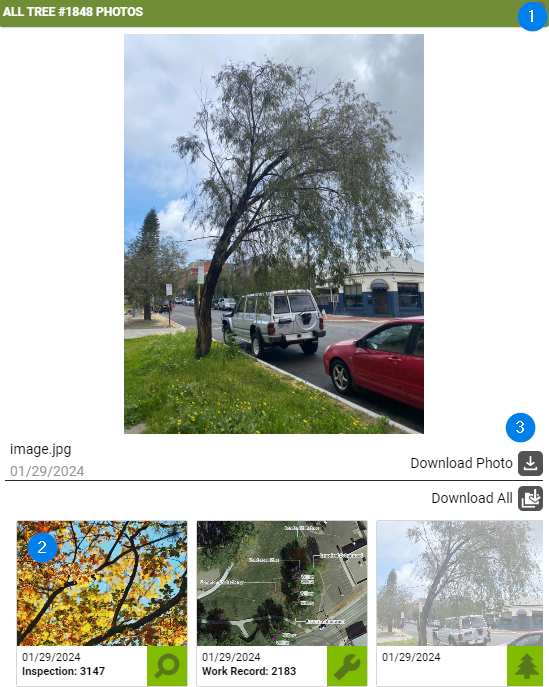
How to view Photos:
- Click on an asset on the map to bring up the popup window
- Click on the ‘PHOTOS’ button
- This will allow you to view Photos from the Details Form, Tree Inspections, and Work Records
- You can toggle from photo to photo by selecting from the thumbnail gallery (2)
- Download either the selected or all photos (3)
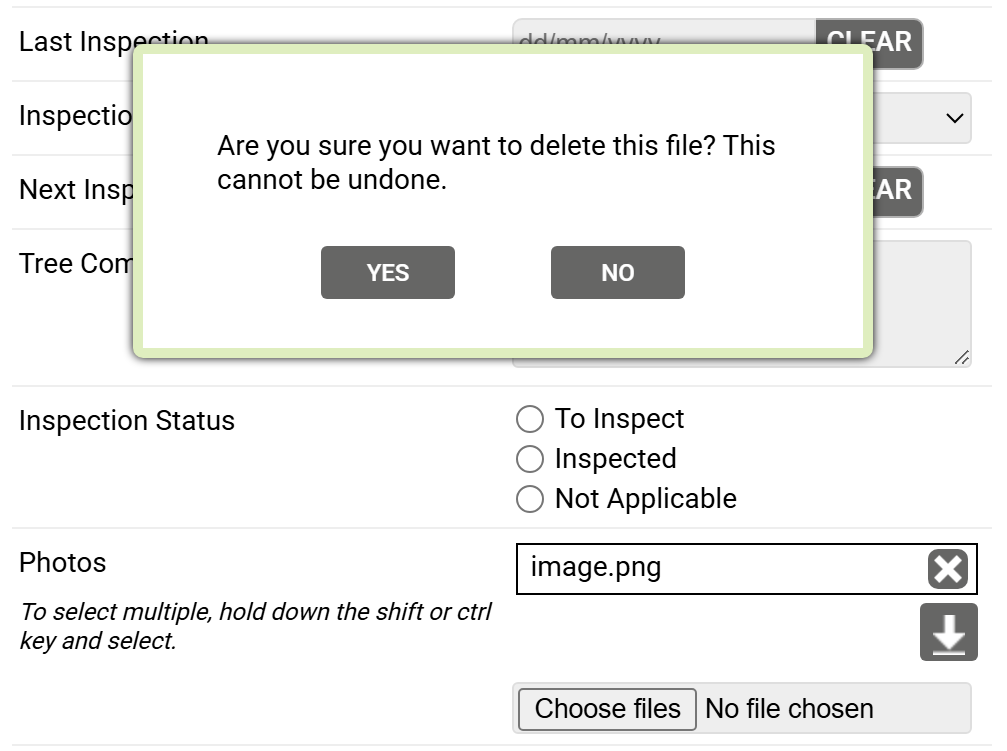
How to remove Photos:
- Open the Details form for the asset (or other tab containing the Photos field)
- Click on the cross against the photo entry
- Say ‘YES’ to confirm you wish to delete the photo
Which photo is best suited to be stored where:
TreePlotter is usually limited to 5 photos per record. So that’s 5 per tree, 5 per inspection, 5 per work record etc.
In order to make full use of the available photo slots, you may wish to consider which photos are stored where. The following is an example, but you can store them any way you wish.
- Tree photos
- To give an overall impression of the tree, including some full tree images and key features
- As you are limited to 5 in total, these may need to be swapped out for newer images as time goes on
- Inspection photos
- Show the tree at this time of year
- Highlight any diseased areas or fungal activity to monitor
- There will be another 5 photos available in the next inspection
- Work Records
- Focus on specific details highlighting the area where work should be carried out
- Include a photo after the work is complete
- There will be another 5 photos available in the next work record
You will be able to see all of these photos from the ‘PHOTOS’ button.
How to export photos:
Photos can be exported out of TreePlotter using the Exporter tool
- Apply a filter to the data, if necessary, to show the records that you wish to export
- Click on HUB > Data Tools > Exporter
- Select the Export Type to choose the format that the data is exported in, such as CSV or shapefile (this isn’t strictly necessary if you just want the photos, but it is mandatory)
- Select the Layer to export, such as trees, tree inspections or groups etc
- Click on the Advanced link
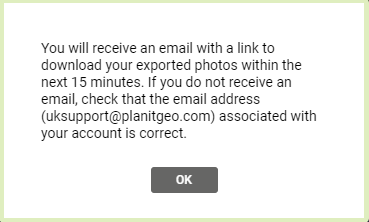
- Tick the box to Export Photos and Attachments

- You will be emailed a link to download the photos
- Download and open the zip file you’ve been emailed to see the photos
- The CSV or Shapefile downloaded (to your usual download location) will contain the Primary ID of each asset and the photos should be prefixed with the same number so you know which tree or inspection the photo relates to.
Which photo types are supported:
- The supported file types are .JPG, .PNG, and .GIF
- Unsupported file types are, but not limited to, JFIF, HEIC, & .DNG
- HEIC is proprietary to Apple
- From IOS 11 onwards, HEIC is the default file type. On your Apple device, go to Settings > Camera > Formats and change camera capture to ‘Most Compatible’ instead of High Efficiency. This will ensure photos are saved as a JPEG.
- Please turn off Apple ProRAW in camera settings if you have .DNG (digital negative) photos (at least whilst you’re taking photos for TreePlotter)
- HEIC is proprietary to Apple
Known Limitations:
- There is a limit to the number of photos you can have per record
- If you try and add a photo and it disappears, please check the file type. If it’s not a supported file type then please convert them to a jpg and upload them again.