
Overview
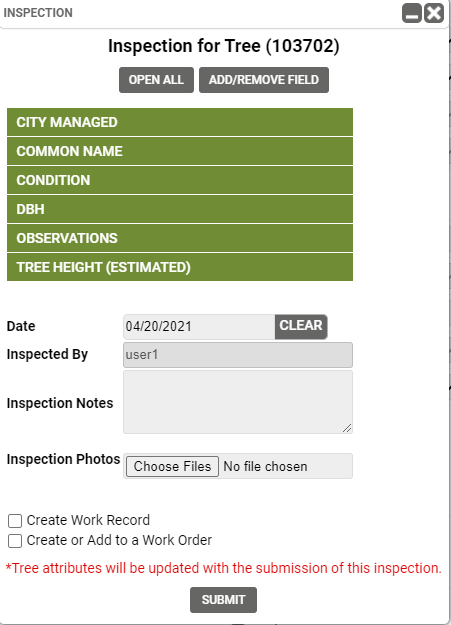
In TreePlotter™ INVENTORY there are two types of Inspections. One type is for Trees and other Amenities. These types of Inspections are the same as the Inspections that exist in TreePlotter INVENTORY. You can learn more about Inspections for your Trees and other Amenities here.
The second type of Inspection is known as Inspection Forms. Inspection forms are available for any layer in your TreePlotter Inventory application and can be customized to match an existing weekly or monthly inspection already in place at your organization. The Inspection Forms in TreePlotter Inventory exist in a separate table from the corresponding layer on your map and can be viewed, exported, and editable by your application users.
Getting to Know the Inspection Form Tool
The Inspection Form tool allows users to keep a detailed history of Inspections that have been completed for their assets over time. Whether it is a weekly, monthly, or yearly inspection, TreePlotter Inventory stores your completed Inspection Forms in a separate table. The Inspection Form fields are customizable by your organization and can provide a digital way of cataloging Inspections all in one place!
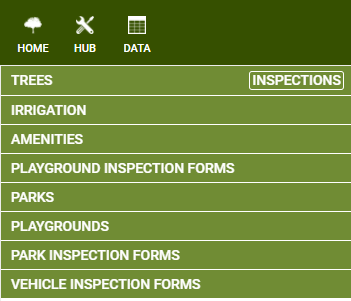
To see what Layers have Inspection Forms for them in your application, look in the Data Table of your application. As you can see below, in this demo application, there are Inspection Forms configured for the Inventory, Playgrounds, and Vehicles layers.
Adding an Inspection Form
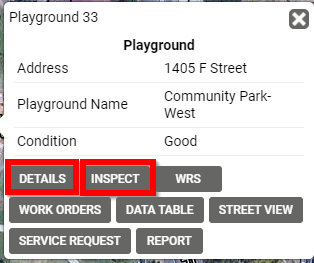
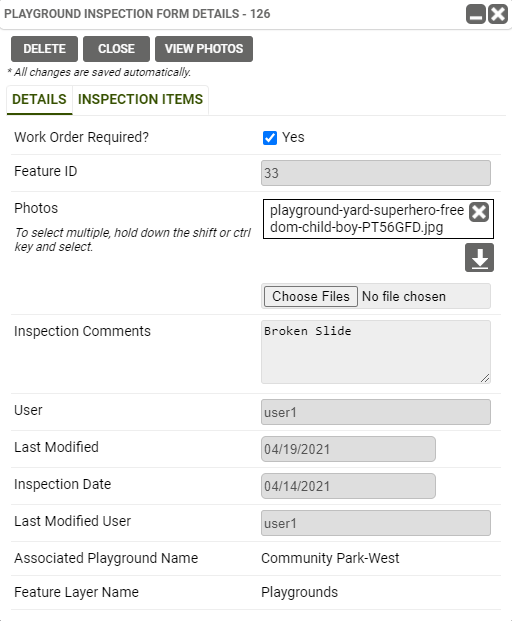
To Add an Inspection Form to your Asset layer, click on the Asset you are trying to inspect. You can add an Inspection Form in the Details form of your asset, or you can click Inspect in the pop up.
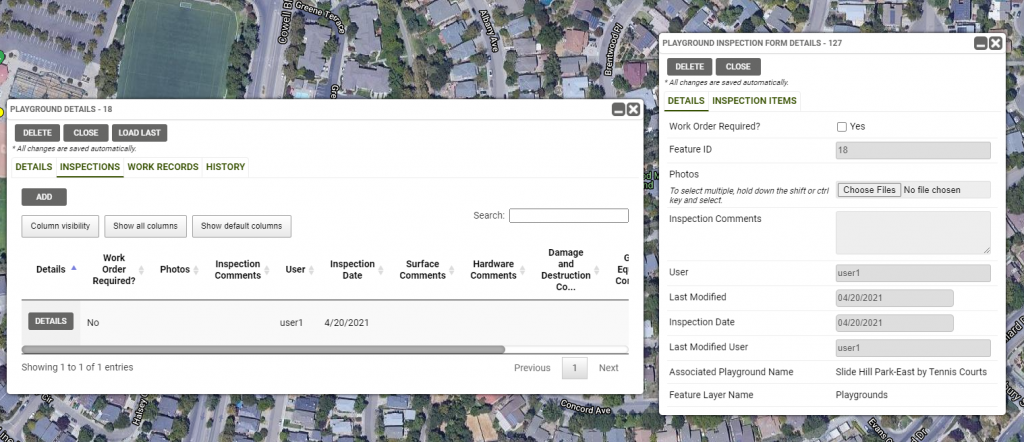
Within the Inspection Details tab, you can add any comments photos, or attachments from your inspection. Your username, the location details, and the date will fill in automatically. In the Inspection Items tab, you will see the highly customizable fields directly about your asset layer. After filling out these fields, you can click Close and the Inspection Form will save automatically.
Viewing and Printing Inspection Form Reports
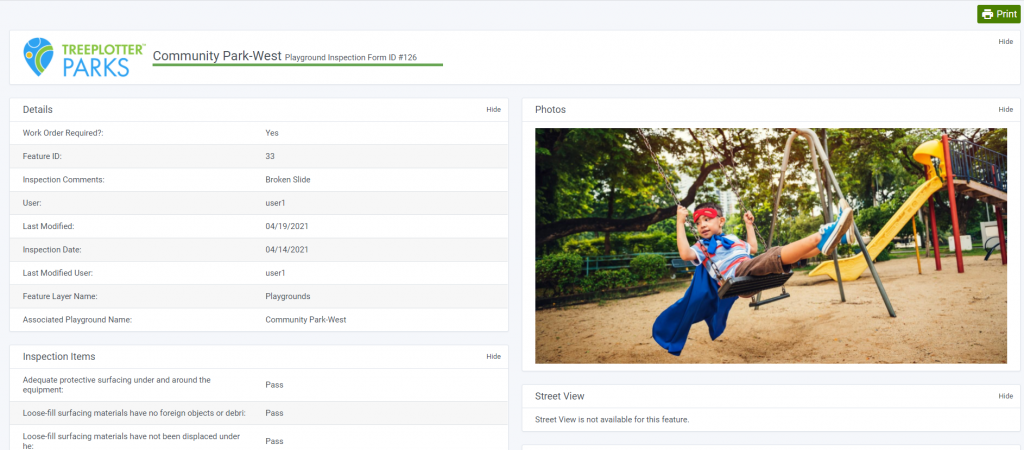
After adding your Inspection Form, the Inspection Tab will update automatically with your new Inspection. You can scroll over to the end of your inspections row and click the Print button to print your inspection report. Any images you uploaded to your Inspection Details will be able to be viewed in your report.
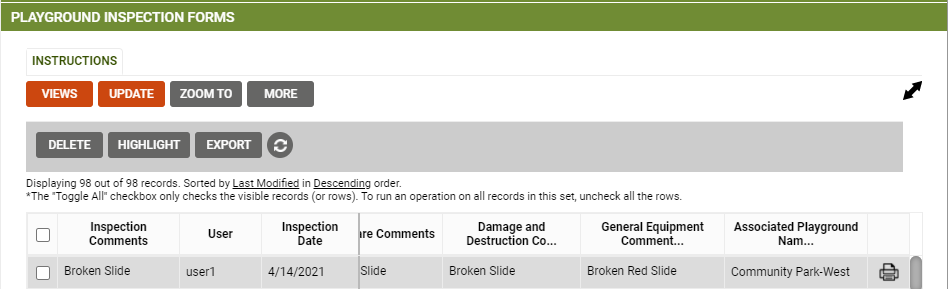
Managing Inspection Forms in the Data Table
From the Data Table, you are able to view and manage your Inspection Forms. After opening the Asset Inspection Forms you would like to view, you can select specific inspections using the check box next to each row. You can zoom to selected Inspection Form locations by clicking the Zoom To button.
To edit your view of the Inspection Form data in the data table, click Views. Using this tool, you can select which fields you would like to view in the data table, in addition to sorting and filtering your data. You can save and manage your Views to be used again.
From the data table, you can update your data, using the Update tool. The Update tool works very similarly to the Mass Updater in the Hub. Before updating your Inspection records, make sure to verify the number of records selected matches the number of records you are trying to update.
By clicking More in the Data Table, you can Delete, Highlight, or Export your selected Inspection Forms or the entire Table.
To learn more about the Data Table and its functionality in the TreePlotter Software Suite, click here.