

Adding a Tree
Add a new tree to your inventory straight from the map.
- The map will open at your current location. Tap the + button to add a tree. Press and hold the spot on the map where the tree is located.
- Under Basic Information, fill in your tree details.
- Check any Observations that apply, add Tree Comments, and select the tree’s Condition.
- Add photos or create work for the tree if needed.
- Tap Save. A confirmation appears and the new tree will appear on the map.
Using Display By and Filters
Change how trees are colored on the map and narrow down which trees you see.
- Tap the Display By / Filter icon in the top-right corner of the map.
- Under Display By, choose how trees are colored using the dropdown. The legend updates to show each category and how many trees are in it.
- Under Filter, set criteria such as a DBH range, work Status, Priority, Assigned To or Task Type.
- Tap Apply to show only matching trees.
- Turn on Show All Trees to keep non-matching trees on the map in gray for context.
- Tap Clear to reset your filters.
Adding a Work Task
Create a work task for a tree and assign it to a team member.
- Tap a tree on the map and open the Work tab (the checkmark icon).
- Tap the Add icon to create a new task.
- Select a Task Type. You can start typing to search the list.
- Set the Priority (Low, Medium, High or Urgent).
- Tap No Due Date to choose a due date from the calendar.
- Tap Unassigned to assign the task to a team member.
- Add a photo if needed, then tap Save.
- The task appears under the tree’s Tasks list and in the Work section of the Home screen.
Completing a Work Task
Mark a work task as done once it’s finished in the field.
- Tap a tree on the map and open the Work tab (the checkmark icon).
- Under Tasks, tap the check circle next to the task you’ve finished.
- The task moves to the Completed tab.
- You can also see completed tasks from the Home screen under Work > Completed.
Completing a Basic Inspection
Record a tree’s current condition and observations during a site visit.
- Tap a tree on the map and open the Inspections tab (the clipboard icon).
- Select Basic Inspection.
- Update the Tree Details as needed, such as Status, Tree Height and DBH.
- Select the tree’s Condition and check any Observations that apply.
- Add photos or create work for the tree if needed.
- Tap Submit Inspection. A confirmation appears once it’s saved.
- To review past inspections, open the History tab (the clock icon).
Completing a Basic Risk Assessment
Evaluate a tree’s risk to help prioritize follow-up work.
- Tap a tree on the map and open the Inspections tab (the clipboard icon).
- Select Basic Risk Assessment.
- Select the Assessed Tree Part and the Target.
- Rate the Likelihood of Impacting Target, Likelihood of Failure, Consequence of Failure, etc.
- The Risk Rating is calculated automatically from your selections.
- Tap Submit Risk Assessment. A confirmation appears once it’s saved.
Using The Navigation Wheel
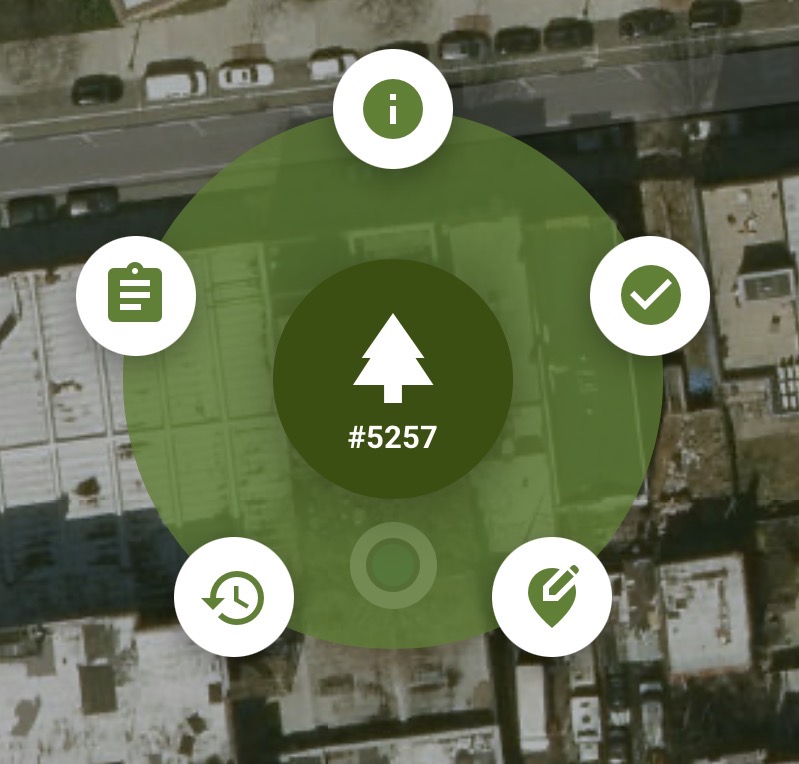
Tap any tree on the map to open the navigation wheel, which gives you quick access to everything you can do with that tree.
- Tree Details (top, “i” icon): view and edit the tree’s basic information.
- Work (top right, checkmark icon): view, add and complete work tasks for the tree.
- Move Tree (bottom right): drag the map to place the pin in the tree’s correct location. A confirmation appears once the tree has moved.
- History (bottom left, clock icon): see a timeline of past inspections and changes to the tree.
- Inspections (left, clipboard icon): start a Basic Inspection or a Basic Risk Assessment.