
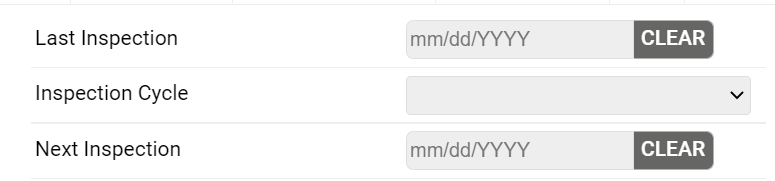
In TreePlotter INVENTORY™, the Inspection Cycle is the time period between Inspections. When Notifications are included in TreePlotter, the Inspection Cycle, Last Inspection date and the Next Inspection date are added to the Details form.
Prerequisites:
- Must have an Admin account in order to access this tool
- Some familiarity with the data field editor
- Tutorial: Inspections
If the Inspection Cycle is updated with a value prior to an Inspection, the Last Inspection date and the Next Inspection date will update with the proper values after the Inspection is done.
Steps to set an Inspection Cycle:
- After the Inspection is done, the Next Inspection date and the Last Inspection date will update.
- The Last Inspection will be the date of the Inspection.
- The Next Inspection will be the date of the next inspection according to the Inspection cycle.

Updating the Inspection Cycle Timeframe:
Within TreePlotter, the Inspection Cycle can be changed to include custom values. Editing of this field is permitted in the Data Field Editor in the Hub under Data Tools.
The Next Inspection date and the Last Inspection date will update based on the Inspection Cycle if the Inspection Cycle value meets the following format:
The number will have to be written in number format (ex. 1, 2, 3).
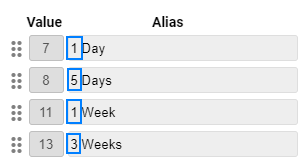
The duration will come next. The duration must be specified in day(s), week(s), month(s) or year(s). These must be in English.
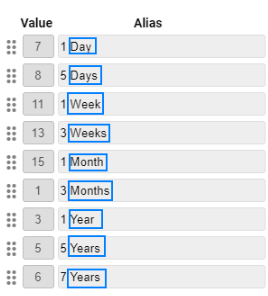
If your TreePlotter uses translations or if any additional words are needed, they will need to go at the end of the values. Parentheses can be used for translation to another language.
![]()
If you cannot find a way to edit the Inspection Cycle, let our Support team know so we can give you permission. If you need to remove values from your Inspection Cycle list, Support will be able to make those changes for you.