In this Tutorial article we will go over the navigation toolbar found on all TreePlotter™ INVENTORY apps.
Prerequisites:
Topics covered in this Tutorial:
- Overview
- Navigation: Zoom In, Zoom Out, Go to Home Extent, Map Rotation
- Locations: Find your Location, Where To?
- Advanced Filter
- Base Map
- Support
- Known Limitations
- Potential Next Steps
Overview:
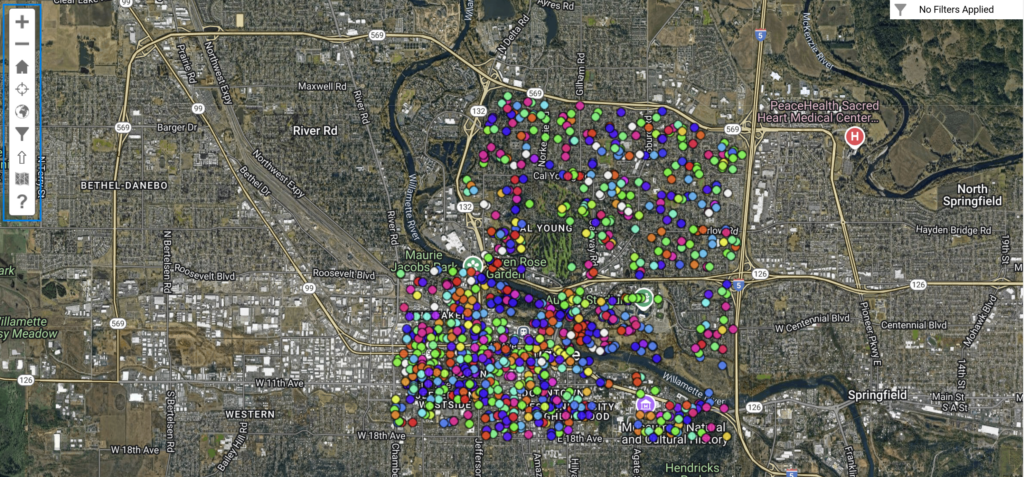
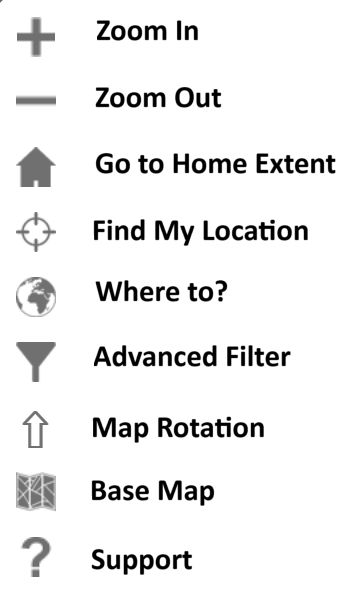
The Navigation Toolbar can be used for basic navigation around the map, advanced filtering, and updating the base map. The toolbar is always found in the top left corner of the TreePlotter INVENTORY apps and includes 8 tools as shown below.


Navigation tools: Zoom in, Zoom out, Go to Home Extent, and Map Rotation
These four tools are your basic navigation tools. Zoom In & Zoom Out are used in conjunction with a standard drag function used with your mouse (desktop PC) or touchscreen (tablet or mobile). These two tools can also be implemented by using the scroll wheel on a mouse or a pinch-to-zoom gesture on touchscreens.
The Go to Home Extent tool will reset the window to the default view first applied on app creation. It will only change the view but will not remove any filters or change the layer being displayed.
By default, the map displays with North at the top. With the Map Rotation tool, you can rotate your map by holding down the ‘shift’ key on your keyboard and dragging the map. To reset the map with North at the top, click the arrow in the navigation tool bar.
Location tools: Find your Location, Where To?
- The Find your Location tool finds your approximate data connection point location and creates a marker which it then zooms to.

- The Where To? tool can find an address and label it with a red pin by entering a full address or conduct an approximate search containing city and state information.

Advanced Filter:
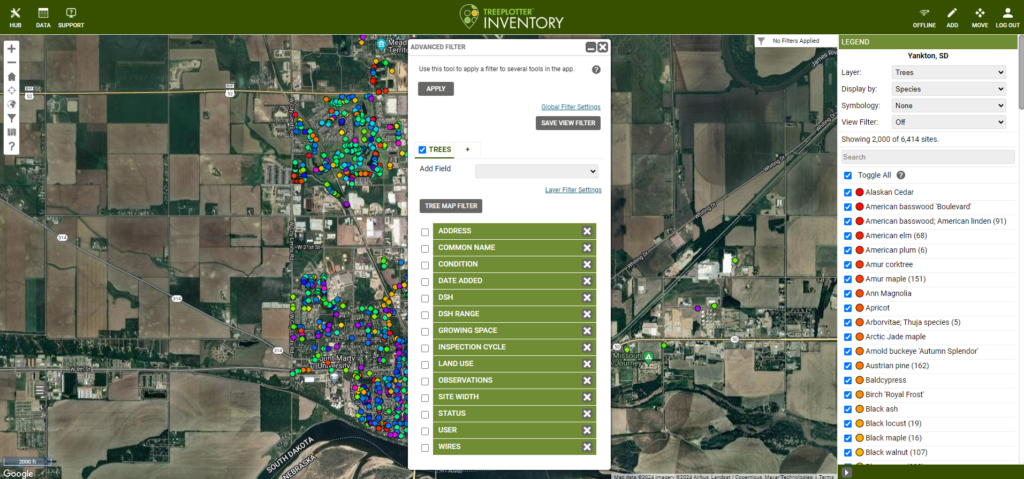
The Advanced Filter tool is one of the most powerful and useful tools in the TreePlotter INVENTORY application. It allows users to create filters for all data fields and layers in the application.

This tool requires attention to detail and understanding the fields in your application. Functions within this tool are described below:
- APPLY – applies filter input
- CLEAR ALL FILTERS – removes all filters currently applied

- SAVE VIEW FILTER – saves all currently applied filters. They can be quickly reapplied through the View Filter dropdown list found in the LEGEND. Will not display if no View Filters exist.


- “LAYER” TABS – Add, select, or unselect which layers you would like to filter for
- ADD FIELD – Dropdown menu allows user to add any and all filterable fields in selected layer
- CLEAR “LAYER” FILTERS – button that removes ONLY filters in the selected layer
- “LAYER” MAP FILTER – Allows user to draw a polygon across map to filter all data points inside of polygon within that layer.
- Polygon can be modified by dragging and dropping points or lines of the polygon
- When polygon is drawn new buttons to TOGGLE POLYGON VISIBLITY(“LAYER”) and CLEAR “LAYER” MAP FILTER will appear
- DATA FIELDS – display and allow user to select, unselect, or remove data fields within the selected layer

Base Map:
Allows user to select base map imagery. Default imagery usually includes ESRI, Google Hybrid, and OpenStreetMap source options and often include base tile options. These advanced map property options are quick-linked in the tool and can be found HUB > MAP TOOLS > MAP

Support:
Opens support tab in HUB which contains support site link, contact info, and quick contact form.

Known Limitations:
- Many of these tools’ functionality can be limited according to log-in status and user roles and permissions.
- Zoom In/Zoom Out: Zoom limits are dependent on Base Map imagery.
- Find Your Location: Only effective on mobile or hotspot connections. Location accuracy depends on connection strength, device specifications, and other factors.
- Advanced Filter: This tool’s functionality is dependent on user roles and permissions and always requires the user to be logged-in.
