Notifications allows you to easily identify overdue or upcoming work required on a tree, so you can carry out the work
What do you get
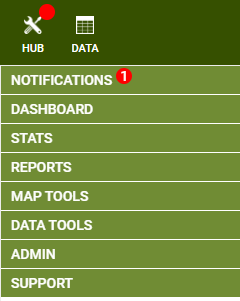
- A red icon on the Hub icon to indicate there are some notifications
- Expand the Hub menu to see the Notifications item, with a count of how many criteria have been met
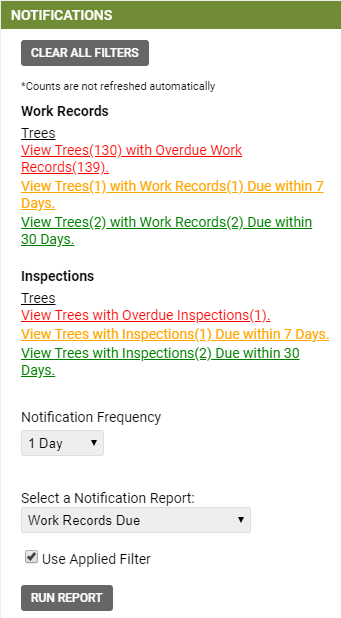
Notifications
There are 3 scenarios relating to work records and 3 scenarios for inspections.
Only scenarios that have been met will be displayed, so you may not see all 6.
The hyperlinks are (traffic) color coded depending on when it was due, red for overdue, orange for due in the next week and green for due in the next month.
Click on the hyperlink to filter the map and show the selected trees.
To see all of the work records, click on the Data Table button and go into Work Records and they will be listed. To see all of the trees due an inspection, click on the Data Table button and go into Trees.
Note: If you make a change to the data whilst the Notifications module is open, close the menu and reopen it for the counts to be refreshed.
Filters
These links are essentially pre-saved filters, which means you can drill further into the data if you want to. Choose the notification first and then go into the Advanced Filter and apply any additional criteria.
Any reports or charts will be filtered to the records selected.
To reset the map back to show all trees, click on the Clear All Filters button at the top of the Notifications module (or in the Advanced Filter).
Notification Frequency
- This denotes how often the red dot on the Hub icon appears, but the Notifications information is always available
- Expanding the Notifications module will make the red dot disappear, but it will reappear according to the frequency selected
- The frequency is set per user
Fields Used to Display the Notification
Inspections
If the Inspection Cycle is populated before an inspection is done for a specific tree, the Next Inspection and the Last Inspection will autopopulate with the correct dates according to the Inspection Cycle. For more about guidelines in using the Inspection Cycle to update the Last Inspection and Next Inspection dates, click here.
Before setting the Inspection Cycle:
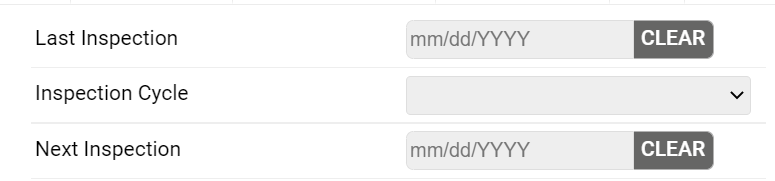
After filling in the Inspection Cycle and doing an Inspection:

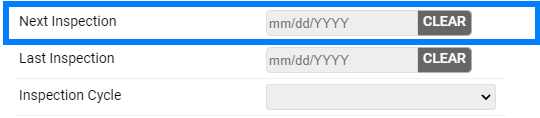
The trigger used to activate a Notification for an Inspection due uses the “Next Inspection Date” field in the Tree Details form. When this field is populated with a date, the Notification will appear in the Hub.
Work Records
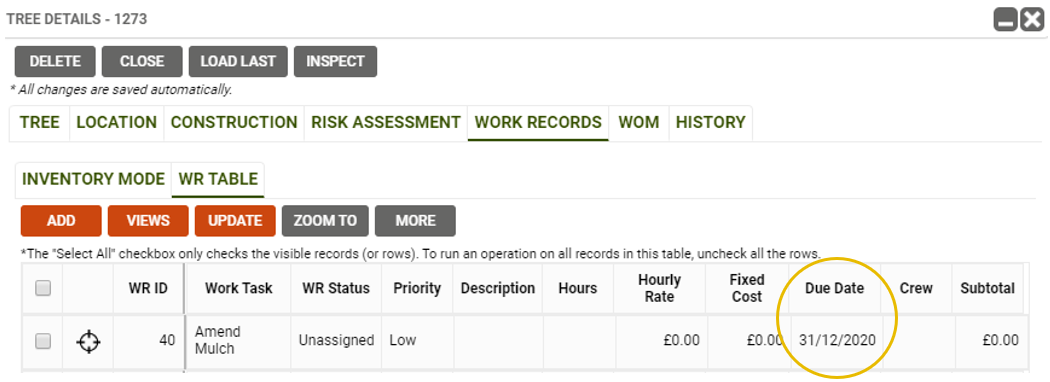
The trigger used to activate a Notification are calculated using the ‘Due Date’ as shown in the Work Records table.
Notification Reports
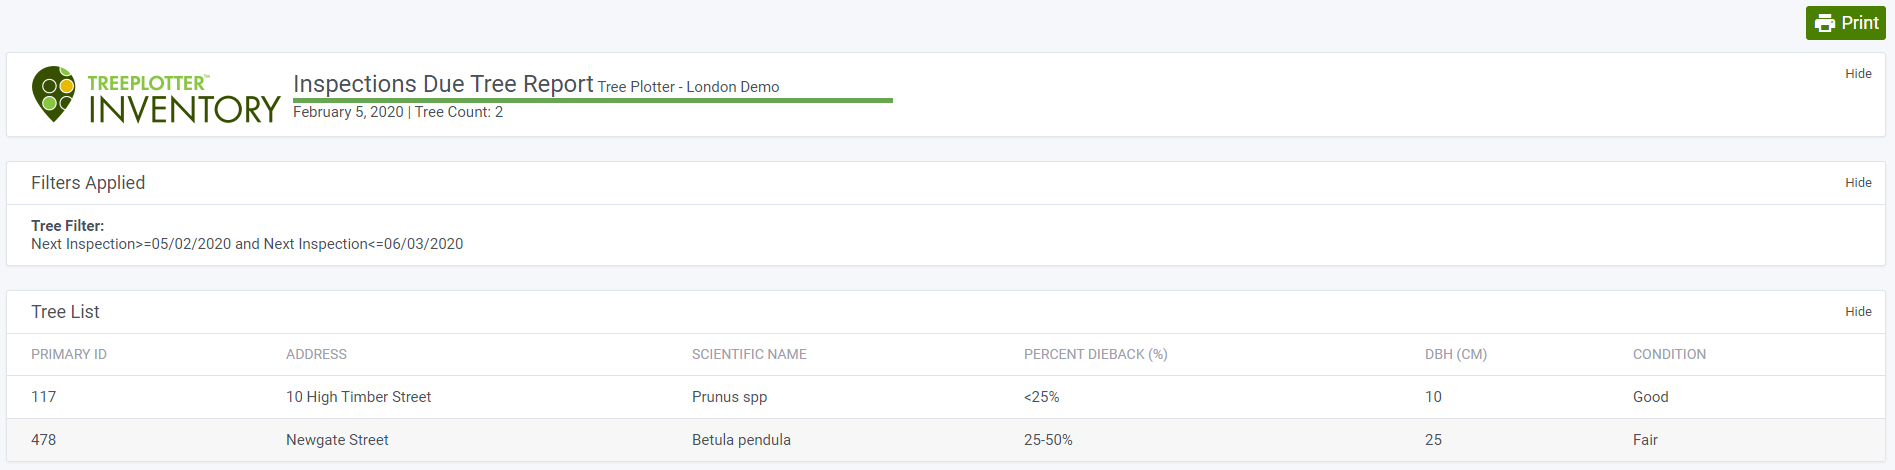
Choose from Work Records Due or the Trees Inspections Due report and click on the Run Report button.
Ensure the Use Applied Filter box is ticked if you want the report to use the filter you have in place.
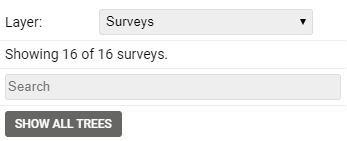
Usage with Organizations, Sites or Surveys
If you have one of these options, then when you click on the notification hyperlink without an organization selected, it will filter the organizations (etc) to those that contain trees that meet the criteria. To see all of the trees regardless of the organization they belong to, click on the Show All Trees button.