In this exercise, we will create a Work Order, assign Work Records to that Work Order, and then Print/Email that Work Order.
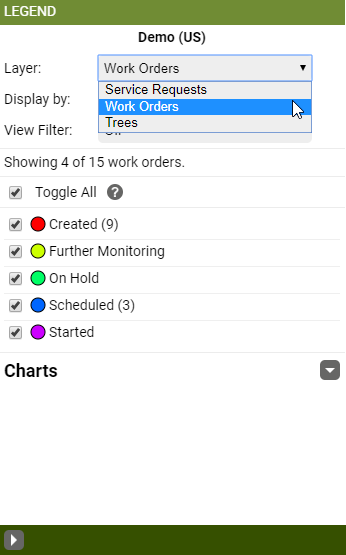
- Set legend to Work Orders.
- Zoom in or do address search to the location where you would like to create a Work Order.
- Click “Add” and drop a point/pin in the map
- The Location tab in the Work Order Details form auto-populates the address based on the Google geocoder.
- The Location tab in the Work Order Details form auto-populates the address based on the Google geocoder.
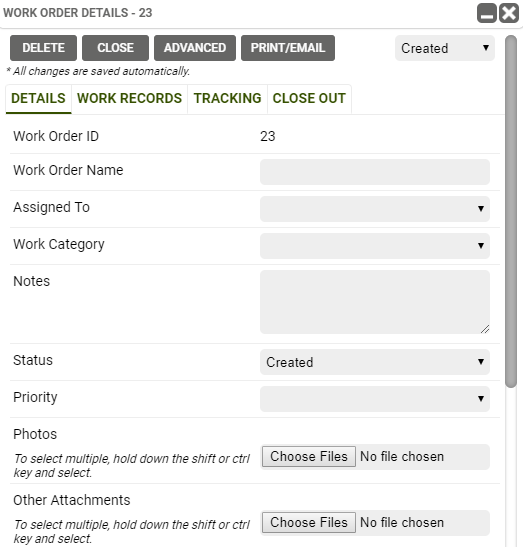
- Under the Details tab, enter information such as Work Order Name, Assigned To, Status and any other information that is relevant to this Work Order. There is also the ability to attach photos or other documents pertaining to the Work Order.
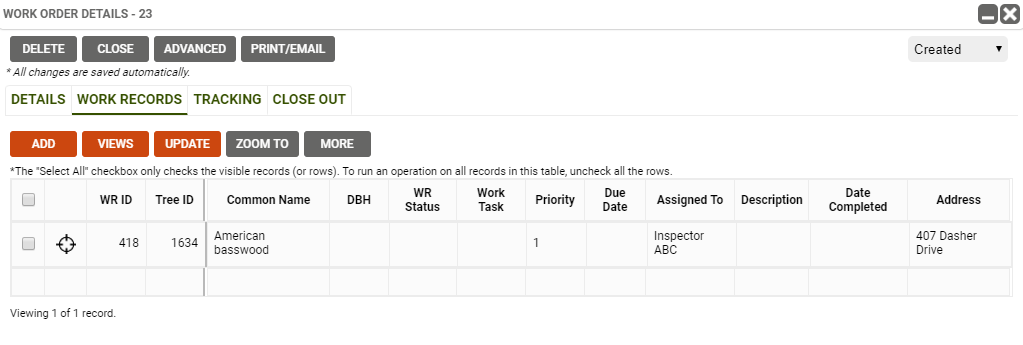
- Next, you will link trees and Work Records to the Work Order. In the Work Records tab, click Add, then select a method:
- For the single Point method, tap tree once to select a single tree.
- For the Multiple Points method, tap and highlight multiple tree points.
- For the Polygon method, draw a polygon in the map and double-click to close the polygon and link the trees that fall within.
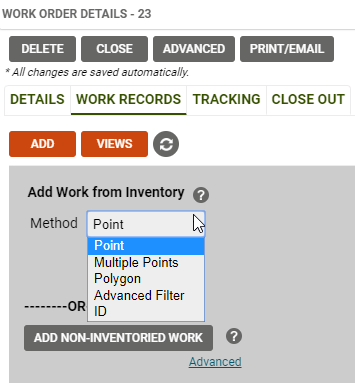
- Any records selected through any of these methods will then link to the Work Order and display in the table in the Work Records tab.
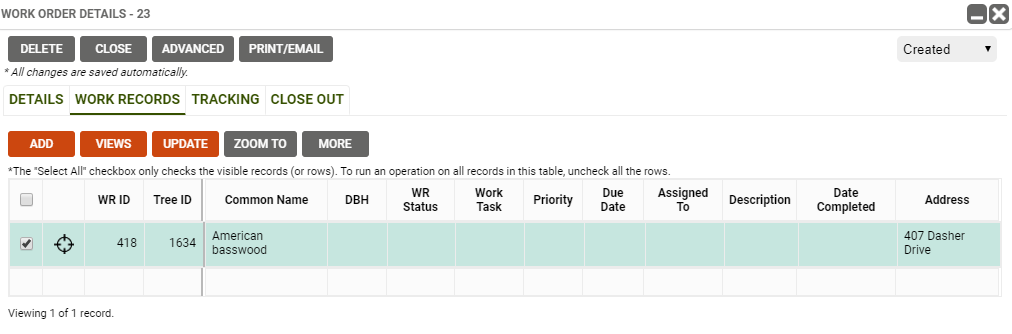
- For trees/sites you linked that had Work Records already populated, review
the data fields, their values, and update any as needed. - For trees without Work Records populated, either:
- Enter values manually in the table (click the “X” in the cell to exit table
editing)
- Or, click the “Update” button and apply a Mass Update to multiple trees and data fields/values. You can also setup Routines to populate these fields.
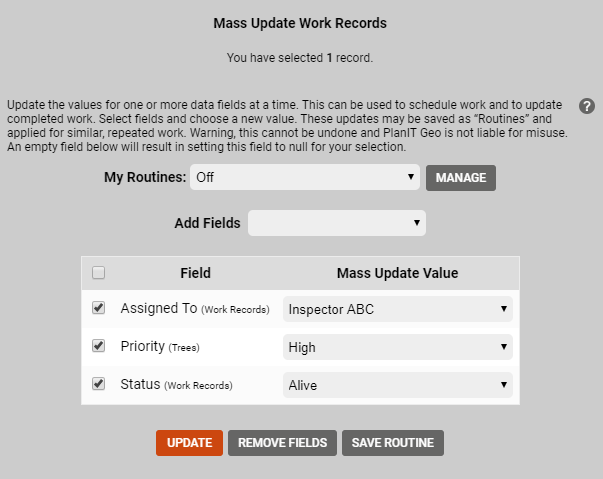
- Now these fields are populated with values for the selected fields:
- Enter values manually in the table (click the “X” in the cell to exit table
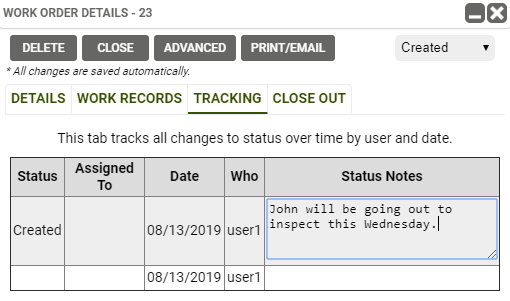
- Once data fields and values for all Work Records are entered and reviewed, click the Tracking tab to preview the Work Order’s status. Anytime the Status or Assigned To fields get updated, those changes will be reflected here. You can also add additional notes if needed.
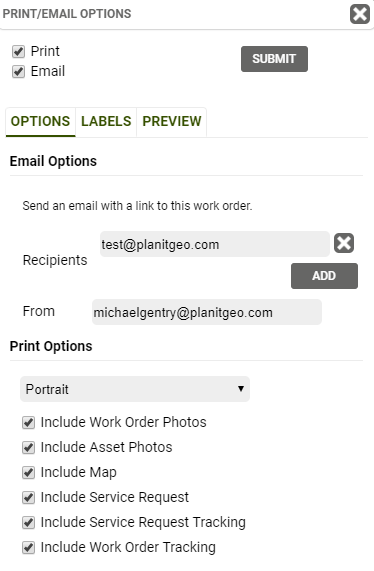
- Click the Print/Email button at top right.
- If emailing this Work Order, make sure the ‘Email’ check box is checked on the upper left hand corner and enter the recipients email address.
- You have many printing options including orientation (Portrait/Landscape), ability to add any photos, you can even add the map of the Work Order if you’d like as well as any Service Requests associated with this Work Order.
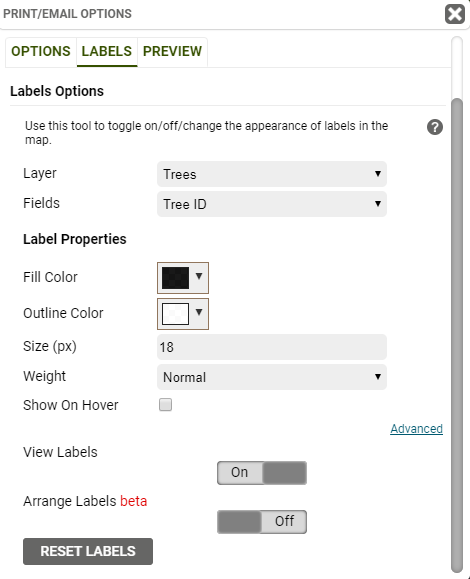
- You also have the option to include labels to your map. For example, if you wanted to display the Tree ID, you can do so by selecting that option from the Fields drop down list.
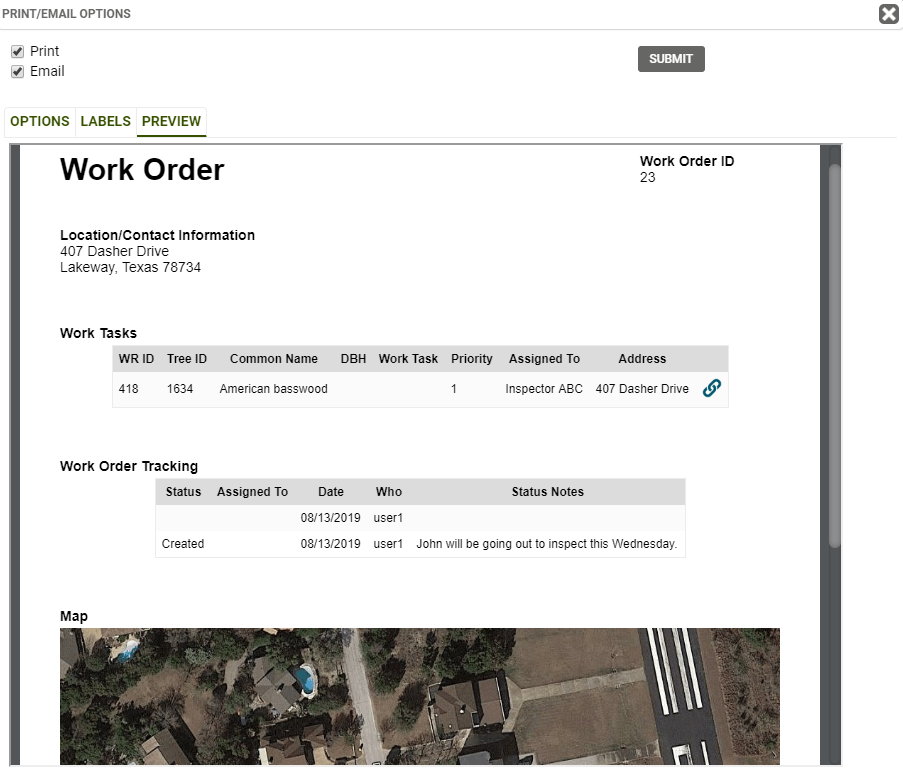
- Click on the Preview tab and this will give you a glimpse of what your Printed/Emailed Work Order will look like. This might help you determine if you’ve added too much or too little to the Work Order form. When you’re ready to Print and/or Email, hit Submit on the upper right.
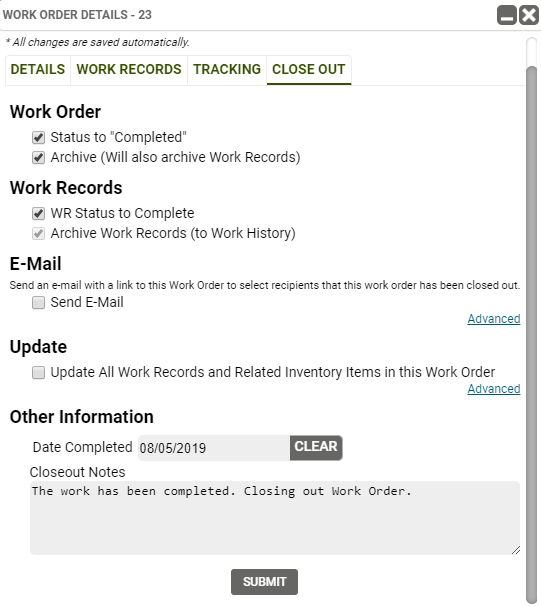
- Once the work is completed in the field, use the Close Out tool to:
- Set the Work Order Status to “Complete” and archive the Work Order
- Set the Work Record Status to “Complete” and archive the Work
Records (sometimes a “Routine” can be applied to update multiple data fields at once) - Set the Service Request Status to “Complete” and archive the Service Request
- Send an email to let certain individuals know that this Work Order has been closed out
- Enter Close-Out Notes (optional) and submit. The Job’s point will no longer appear in the map since it is archived, and the Work Records will be moved into the “Work History” tab in the Work Records data table (in the Data button at top left of the app).
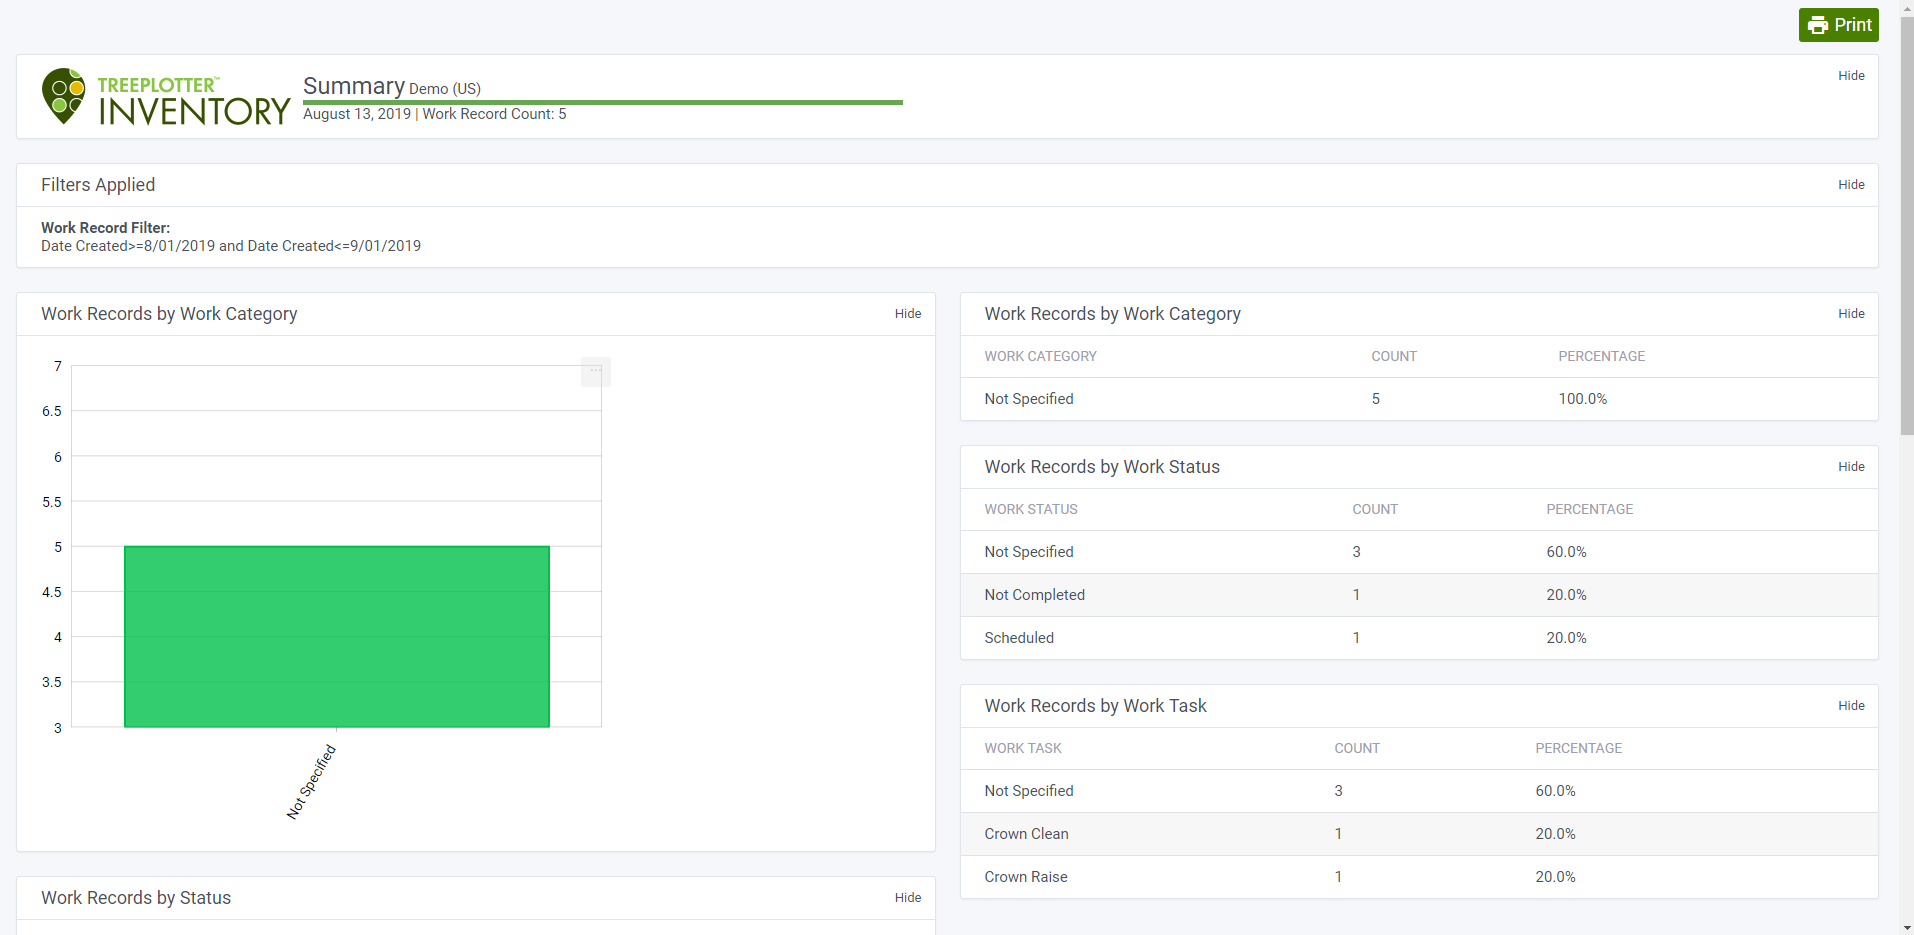
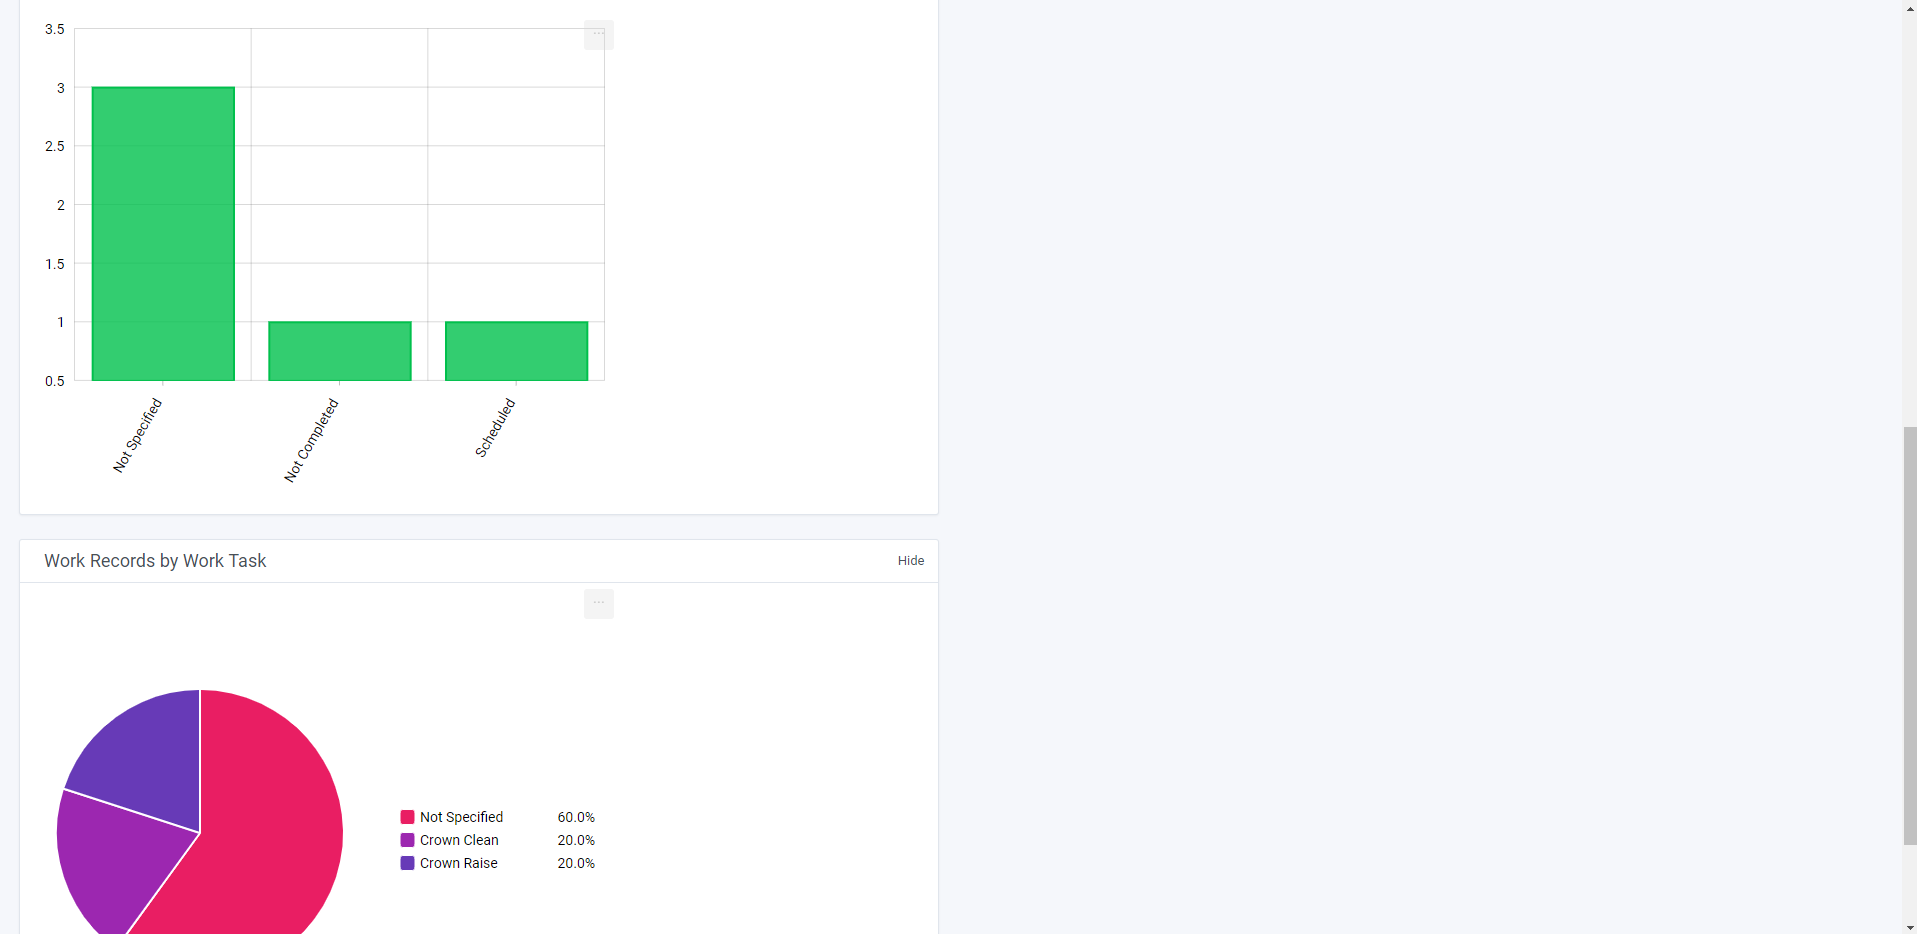
- Run reports from the Work Records / Work History tab located in the Hub
- The reports will run on any Work Records that have been created or Work Records that have been archived (Work History).
- Choose a Report Quick Filter (optional).
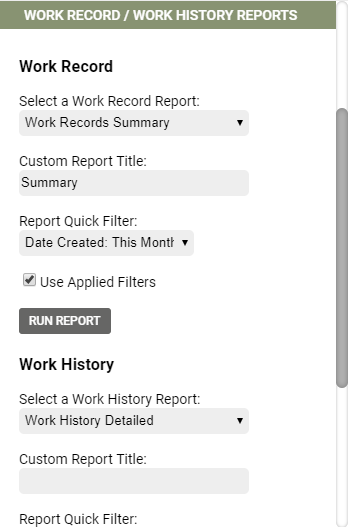
- When ready, click ‘Run Report’. Review report in the web browser. Notice how you can hide certain sections of the report by simply clicking on ‘Hide’. Your report will look something like the example below: