
The Work Order Management add-on module for Tree Plotter offers multiple
workflows to create and manage your Work Records, Work Orders and Jobs. It is
possible to either first assign Work Records to trees, then generate a Work Order, or
you may first create a Job, then associate Work Records and trees. The below
exercises will walk through these workflow options.
Method 1:
- Locate the tree that you need to assign a Work Record to. You can do this in a
number of ways:- Using zoom/pan tools in the map
- On the Navigation toolbar, use the address search button and
enter in the address where the work will take place. - Use the Advanced Filter tool to search for specific trees by any
specific attributes or location
- Click on the tree point – then choose the Details button
- Under the Management tab, select the Inventory Mode tab, choose a Work
Category and then choose a Work Task.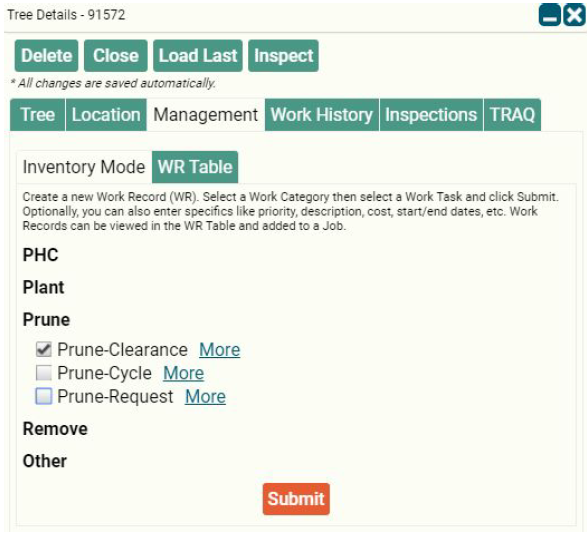
- Optionally, click “More” to enter other values associated with the Work
Task, such as priority, description, time estimates, costs, etc.
- Optionally, click “More” to enter other values associated with the Work
- Once you have chosen the Work Task you would like to associate with this
tree, click “Submit” at the bottom of the window. This will create and add the
new Work Record to the WR Table. You can also now edit the values in the
WR Table, as well as adjust the columns using the Views button.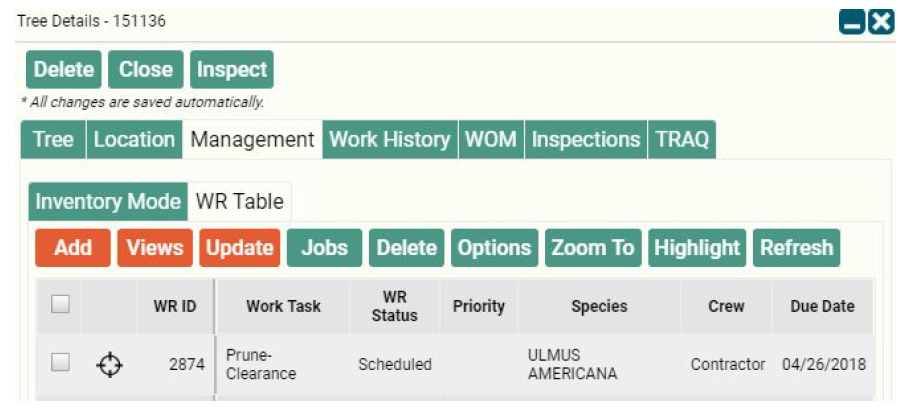
- Now, you may select the Job button to create a new Job/Work Order (We will
cover this in a different exercise), or close the tree form to search for Work
Records later.
Method 2:
Alternatively, all of this can be done in bulk, using the Update tool in the Work
Records / Work History data table or Job details form, to create and populate multiple Work Records for
multiple trees at once. Here’s how:
- Use the Advanced Filter to query attributes and/or the map for the specific
trees that you need to attach a Work Record to. ( Note: This can be done
without a filter applied, but it’s easier and safer to have one applied.) - In the Work Records / Work History data table or Job details form, click the ‘Add’ button.
- Choose one of the methods for linking trees from the inventory (i.e.
creating Work Records for just the filtered trees).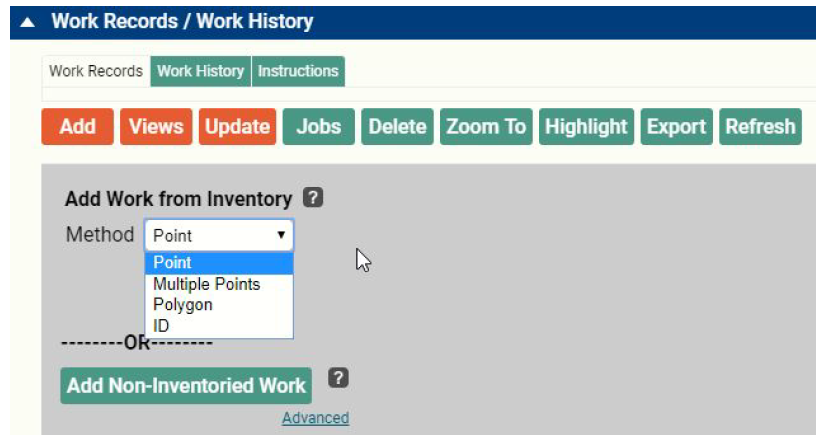
- For the single Point method, tap tree once to select a single tree. Then
click Done Linking at bottom left. - For the Multiple Points method, tap and highlight multiple tree points.
Then click Done Linking at bottom left. - For the Polygon method, draw a polygon in the map and double-click
to close the polygon and link the trees that fall within.
- Choose one of the methods for linking trees from the inventory (i.e.
- Update the Work Task, WR Status, or any other fields by using the Update →
Mass Update Work Records and choosing specific fields to update through
the Add Fields option, or applying a saved Routine.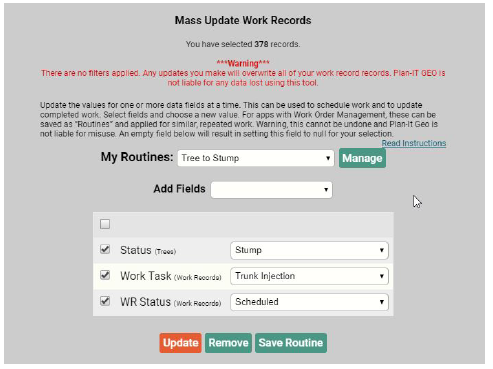
- Once you have set the fields to update, or applied the existing Routine,
select the Update button. You will receive a the following warning
message regarding running a Mass Update.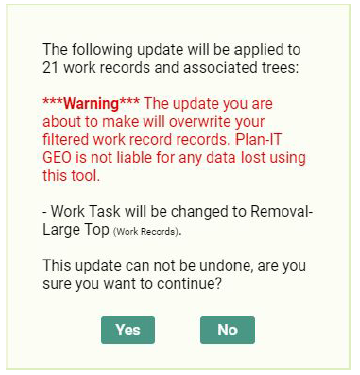
- Once you have set the fields to update, or applied the existing Routine,
- If you want to add these newly created Work Records to a Job, select the Jobs
button.- This will give you the option to either create a new Job, or add the Work
Records to an existing Job. In this case, we will create a new job.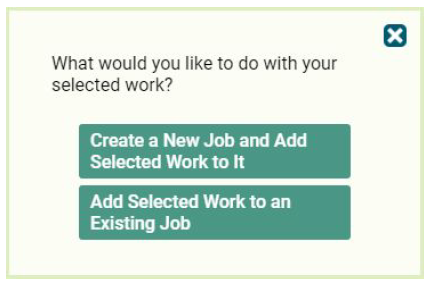
- Once created, you will see the following prompt:

- Select Yes, and the map will zoom to the Job and open the Job Details
window. From here, you can input Job information, edit the Work
Records, create a Work Order, and Close Out the Job once it is
complete. We will go over these steps in WOM Tutorial – Creating Jobs and Work Orders.
- This will give you the option to either create a new Job, or add the Work