
The TreePlotter™ Layer tool can be used to customize the appearance of any inventory layer present in your app.
Topics covered in this tutorial:
- Navigating to the Layer Tool
- Layer tool properties
- How to export your Map with Layers

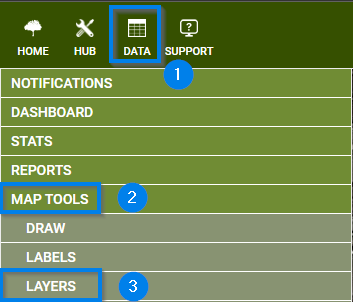
Navigating to the Layer Tool
- Navigate to the HUB in the upper left-hand corner of you application
- Scroll down to the Map Tools menu
- Select the LAYERS option
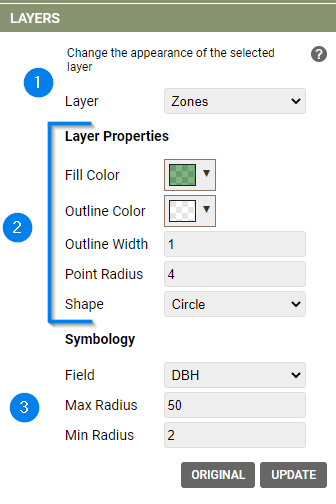
Layer Tool Properties:
- Select a Layer
– Layer options are the same as those found in your Legend - Change the parameters
– Layer color, size, or shape - Additionally, you can visualize by Symbology
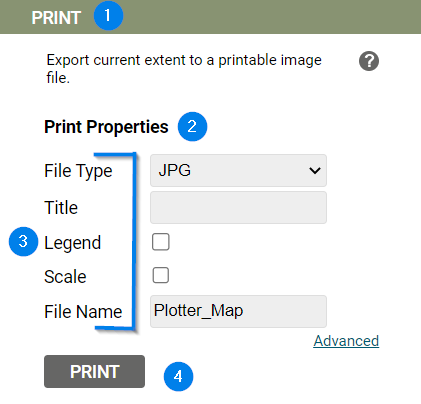
How to Export your Map with Layers:
- Navigate to the PRINT option within the Map Tools menu
- Select a file type
- Fill in the Title and File name
– Additionally a Legend and/or Scale can be added in this step - Click the ‘Print’ button
Known Limitations:
Only one color or symbology feature can be used at a time.