
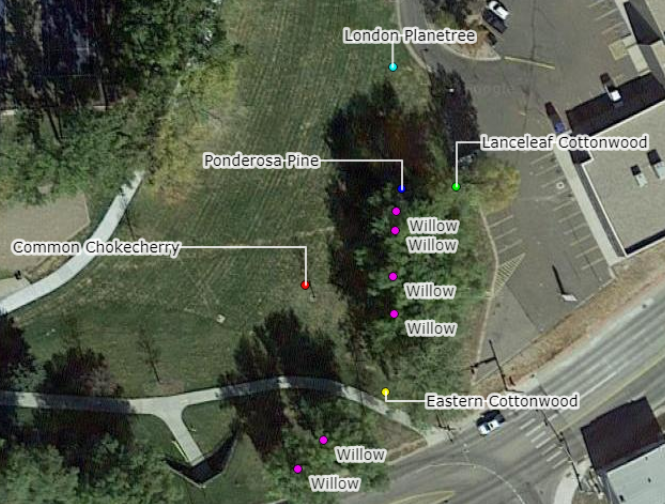
The TreePlotter™ Labels tool can be used to select a layer and field to label on the map.
Topics covered in this tutorial:
- Navigating to the Label Tool
- Label Tool Properties
- How to export your Map with Labels
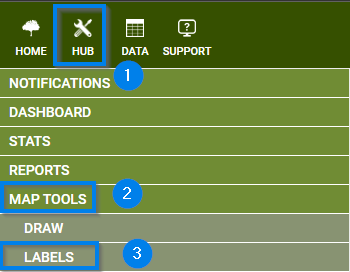
Navigating to the Label Tool
- Navigate to the HUB in the upper left-hand corner of you application
- Scroll down to the Map Tools menu
- Select the LABELS option
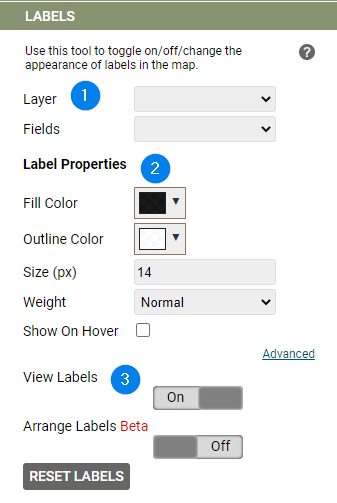
Label Tool Properties:
- Select a Layer and Field
– Layer options parallel those in your Legend
– Fields correspond with those in your Details Form - Change the parameters
– Label color, size, or weight
- Choose how to view your Labels
– View Labels on Hover
– View Labels all at once
– Arrange Labels as needed
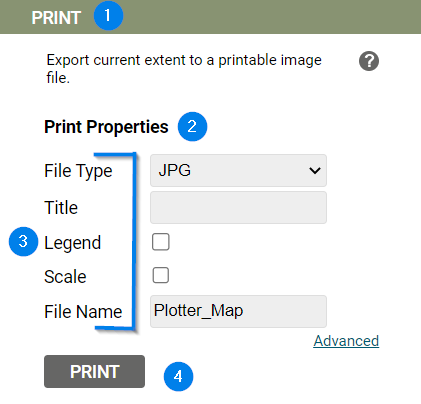
How to Export your Map with Labels:
- Navigate to the PRINT option within the Map Tools menu
- Select a file type
- Fill in the Title and File name
– Additionally a Legend and/or Scale can be added in this step - Press the ‘Print’ button
Known Limitations:
- The Arrange Labels feature is not compatible with any changes in the text parameters.
- Labels only stay on screen temporarily, so if you would like to add default labels to your map that will appear every time you access your application, please reach out to the support team if you are interested in default labels.