
Are you looking to share your tree inventory with the public or community members out in the field? TreePlotter INVENTORY has a few options, including QR Codes, to help users quickly get access to the information they want. In order to share data publicly, application permissions do need to be configured accordingly. Contact support@planitgeo.com if you need help with this configuration.
Share Button
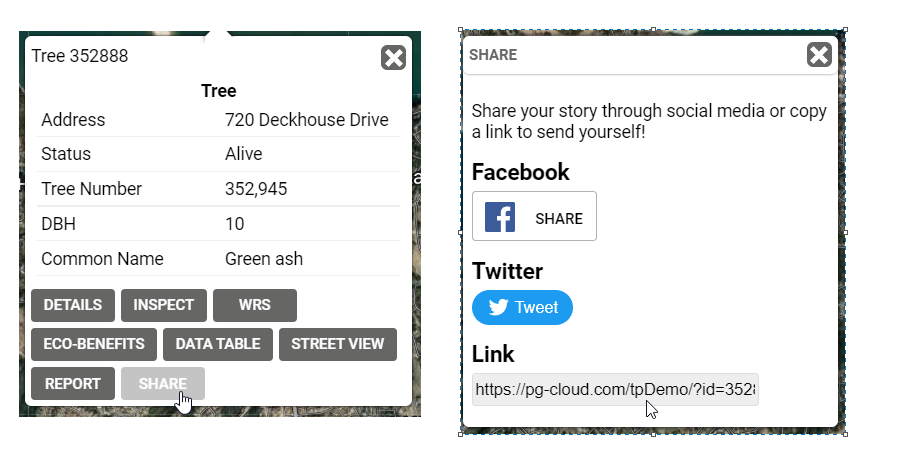
Use the share button within the tree popup to obtain a link specific to that tree. Accessing the URL will bring the user to the corresponding TreePlotter application and highlight the selected tree.
Generating QR Codes
Utilize QR codes if you want an easy way for users to quickly access TreePlotter trees without having to type in the full URL. They can be used as part of a tree tour or even created for all trees in your inventory. Follow the guide below to quickly generate QR codes from a TreePlotter export. Note: This guide does require some knowledge of the TreePlotter application tools, as well as, basic Google Sheets proficiency.
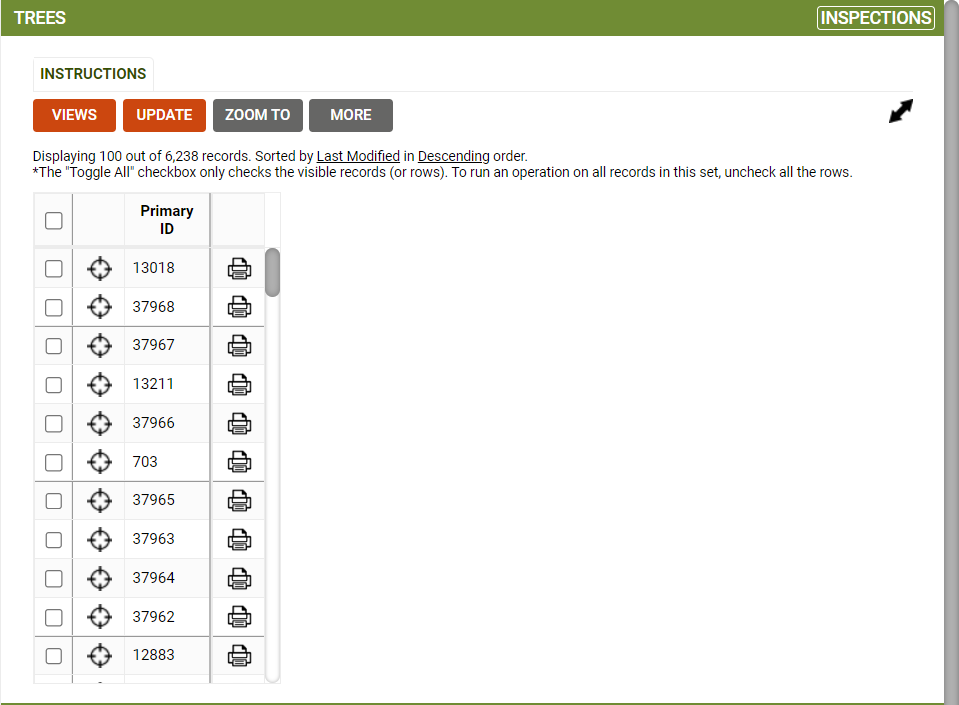
First, export a list of Primary IDs for the entire inventory or a subset of trees. Apply a filter using the advanced filter if you need just a subset of trees. This filter will be carried across to the data table and data export. Within the data table, use the VIEWS button to limit the data columns to just the Primary ID field.

Once the view is applied, the data table should look like this, with just a single column for the Primary ID. To export the data, click MORE>EXPORT. Choose the trees layer and CSV export type.
There are a few options to get the data into Google Sheets. You can use the import tool in a blank spreadsheet to bring the CSV file in directly or copy and paste the column from another application. Set up your spreadsheet with three columns, one with the exported Primary ID, one for the URL, and a final one for the QR Code.
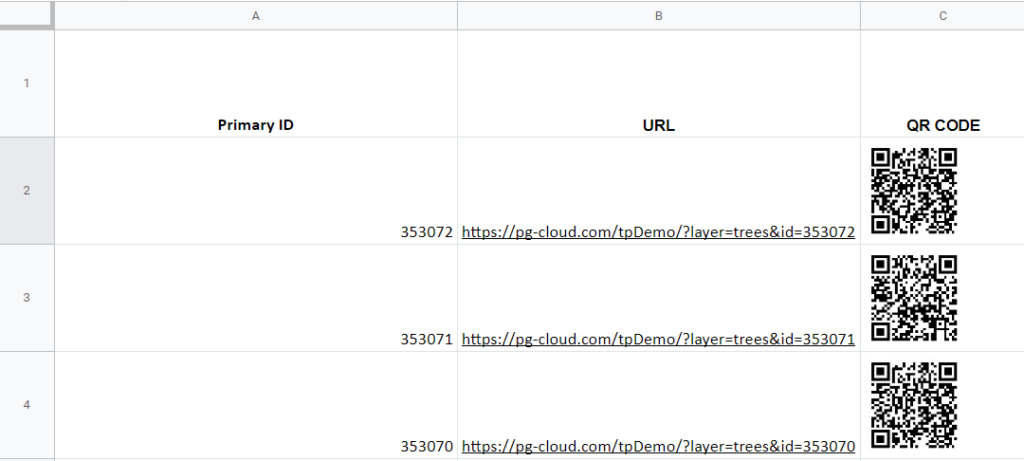
In the URL column, you will need to set up an equation to combine the TreePlotter application URL with the Primary ID from the first column. Copy the equation below and update the name and cell value as needed. Once the equation is working as expected, carry the equation across to every cell in the URL column (double-click while hovering over the bottom right corner of the cell).
="https://pg-cloud.com/tpDemo/?layer=trees&id="&A2
*Update with your unique application URL (blue)
*Update with the corresponding Primary ID cell in Google Sheets (green)
Finally, add the following equation to the QR Code column and carry it through to all cells in the column. In this equation, there is only one change to make.
=IMAGE("https://quickchart.io/qr?text=" & ENCODEURL(B2))
*Update with the corresponding URL cell in Google Sheets (orange)
If the equations are working as expected you should now have a column of unique QR codes for every tree in the exported list. You can now save the codes and use them as needed.
Things to consider
- Permissions
- The trees that have QR codes should be visible to the public (if you want the public to scan the code), otherwise they won’t be able to see any details
- You may wish to double check which fields are available to the public and ensure they can see what you want them to (and perhaps nothing more)
- Do you need to keep track of which trees have a QR code? You might like to use the Data Field Editor tool to add in a tick box or perhaps a text field to store the QR code in.