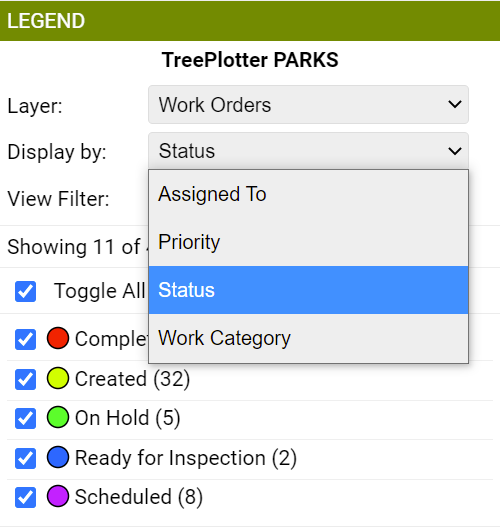
Viewing Work Orders on the Map
When Work Order Management is added to your application, you will see a Work Orders layer in the Layers dropdown of the Interactive Legend. When you select the Work Orders layer, you can view the layer by Status, Crews Assigned the Work Orders, Priority, the Category of Work or any other custom display you have requested.
Adding a Work Order

Once you have the Work Orders layer selected in the Interactive Legend, to add a Work Order, click Add in the top right corner of your screen. Then click the location on the map where you would like to add your Work Order. After clicking, the details form will appear.
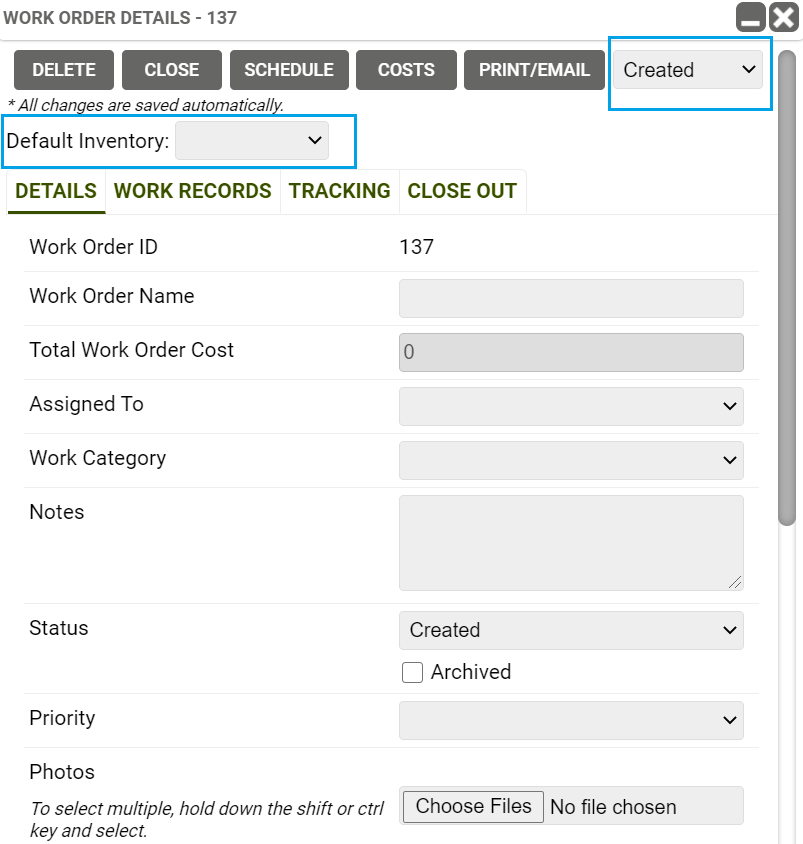
Details Form
In the details form you can type in the Work Order Name, Crews Assigned the Work Order, any notes, Status, Priority and add any photos or attachments. The location details, user and date created or modified will be entered by TreePlotter automatically.
You can select a Default Inventory layer to link to the work order. This is an optional step. If you choose a Default Inventory layer all Work Records associated with this Work Order will be linked to that layer. If you do not choose a Default Inventory layer, you will be able to associate this Work Order and Work Records with more than one inventory layer.
While you are visiting any tab within the details form, you can edit the Status of your Work Order using the drop down in the top right corner.
Work Records Tab
In the Work Records tab, you can add and link existing Work Records to your Work Order. To add a Work Record, click Add. If you did not selected a Default Inventory, you will be asked to select a layer and then choose the Method you would like to use to link Work Records in that layer to the Work Order.

Tracking Tab
You can track your Work Orders status in the Tracking tab. In this tab, you will see the Work Order Status, Crews the Work Order was assigned to, the date, who created the work order or edited the status, and any notes.
If you change the Status of the Work Order in the top right corner of the Details form, a new row will be created in the Tracking tab.
Costs
To associate expenses related to your Work Order, click on Costs in the top of the Details form. Here you can fill in the Cost of the Work Order and Man-Hours and Hourly Rates required. You can enter the specific Labor, Equipment and Materials needed. The total costs will be updated in the Details tab in the Details form.
If you cannot find the Labor, Equipment, or Materials you need in the Cost calculator, you can add them within the Cost Calculator by clicking Add, or in the Lookup Tables in the Data Tools section of the Hub.


Schedule Work
To schedule work, click on Schedule in the top of the details form. You can repeat the Work Order (WO) any number of times on a daily, weekly, monthly or yearly basis.
After Scheduling the Work, you will see duplicates of the Work Order on the map and be able to use the arrows in the Work Order pop up to scroll to future Work Orders.
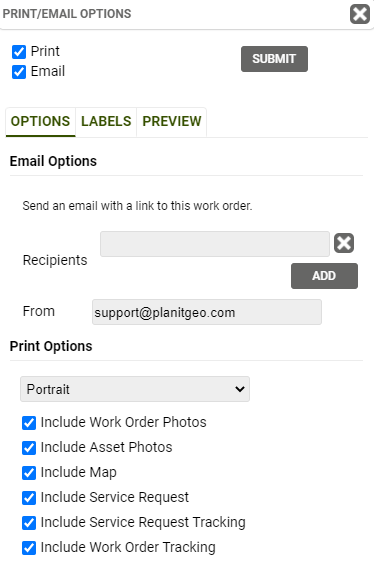
Print/Email
Using the Print/Email button in the top of the Details form, you can Print or Email the maintenance crews and other clients directly from your TreePlotter PARKS application. In the Options tab, you can format your email, and printing options. In the Labels tab, you can customize the asset labels on the map portion of the report. In the Preview tab, you can preview the email or report. Click Submit when finished customizing your printed report or email.
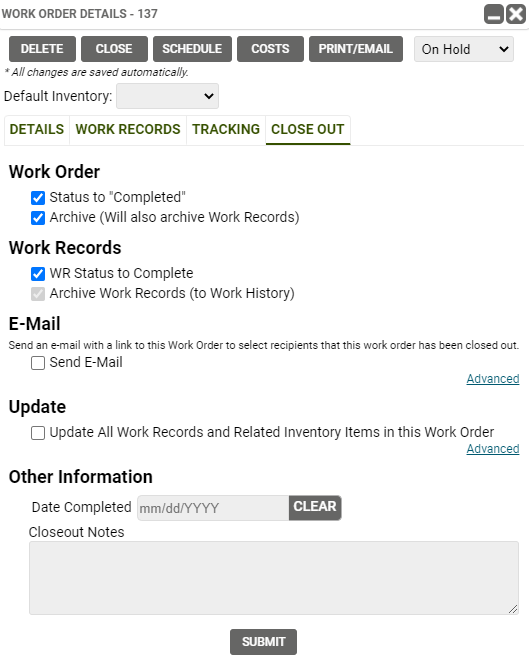
Close Out Tab
When all work for a Work Order is completed, to Close Out the Work Order, click on the Close Out tab. Here you can update your Work Order and Work Records, as well as send an email to your crews and clients. You can update the Work Records and Related Inventory Items in the Work Order using the Update option. Be sure to enter the Date Completed and any Notes, and click Submit.
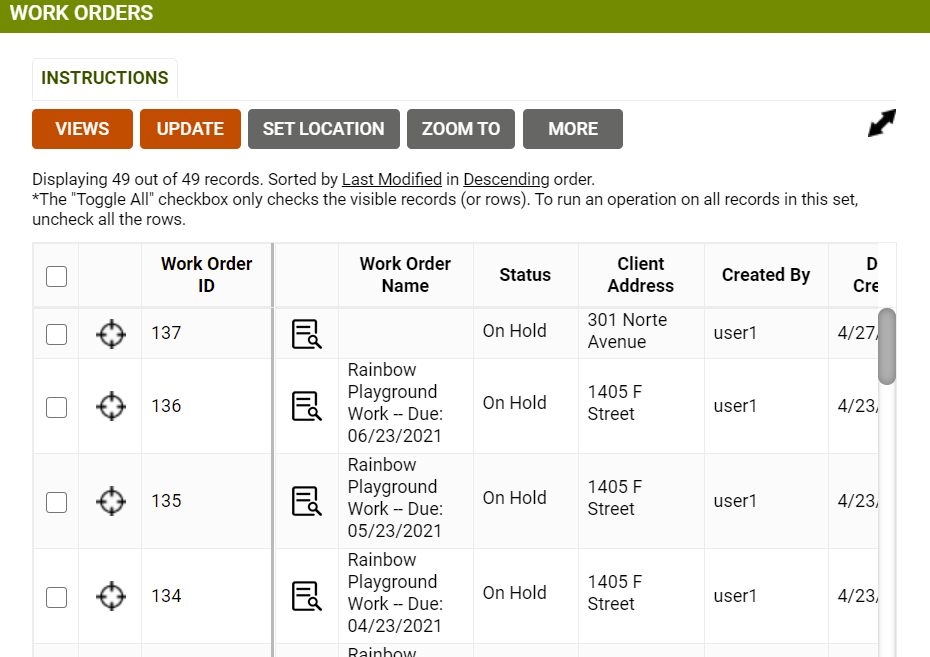
Viewing Work Orders in the Data Table
You can manage your Work Orders in the Data Table. In Views, you can edit what columns are visible in your Data Table, sort your Work Orders and apply filters.
You can Print a Work Order by scrolling over and clicking the Print button.
Reports
To Export out Reports of your Work Orders, navigate to the Reports section of the Hub. Select the type of Report, enter the title of your choosing, and even apply a filter on the Work Orders you would like to be included and click Run Report.
Want to a video tutorial on Work Orders in TreePlotter PARKS? Click below: